

Hand embroidery is a creative and versatile art form that has been practiced for centuries. Although there are many modern ways to embellish textiles today, hand embroidery remains an important technique for those seeking a personal, handmade touch. To help you take up this new hobby, I'll show you four stitches and explain how to achieve great results using a pattern.
KNOWLEDGE ABOUT GETTING STARTED WITH HAND TICKETING
✁ Stick Basics | Accessories & More
Fabrics
Embroidery fabrics are specially designed for embroidery. They are characterized by their density and stability, which allows them to be embroidered without the fabric fraying or becoming deformed.
There are many types of nitrogen, differing in composition, density, and appearance. Some nitrogens are thin and transparent, while others are thick and opaque. Some also possess special properties, such as water solubility or self-adhesive qualities, which are helpful in certain embroidery techniques.
There are also pre-printed fabrics where you can choose the embroidery pattern in advance. Cotton is usually used for the embroidery fabric, so you can confidently use this.
Silk and linen are fine fabrics, but when it comes to sustainability, your leftover piece from your last woven fabric project will be the best choice.
Based on our experience, we recommend a cotton-bamboo blend for small embroidery projects. The base color of the fabric has a beautiful sheen, which makes the yarn stand out even more.
Another simple option for exercises is the Ditte woven fabric from Ikea, which performs well in the lower price segment and is available in several colors.
Important: Steam the embroidery at the end of the project to prevent it from warping and to ensure a nice finish.
embroidery hoop
The embroidery frame * is a useful tool for embroidery and other craft projects where fabric or canvas needs to be stretched.
Commonly used are round or oval embroidery hoops made of wood or bamboo, which fit inside each other and can be attached by a screw or a clip on the side.
Especially for beginners, a medium-sized embroidery hoop is a good idea, as stretching the fabric affects the evenness of the stitching. It's best to choose the hoop according to the size of your project, since removing and re-hooping the fabric can damage the stitches.
Smaller frames are ideal for small embroidery projects or for trying out new stitches, while larger frames can be used for larger projects such as wall hangings or blankets.
For beginners and as a handy size, I recommend the Prym embroidery hoop with a diameter of 18.5 cm . Smaller hoops are suitable for small projects and trying out new stitches.
These small mini embroidery hoops with backing make a wonderful gift. Everyone will appreciate a thoughtful present or use them as a keychain.
Yarn selection
The design brings with it possibilities, color palettes, and ideas. The right yarn plays a crucial role here.
Embroidery thread is a special type of yarn used for embroidery. It is available in an incredible variety of colors and textures and can be made from natural or synthetic fibers.
One of the most important properties of embroidery thread is its colorfastness. Embroidery thread must have high colorfastness to ensure that the colors do not fade or bleach even after a long period of time.
A simple rule of thumb regarding yarn:
The coarser the fabric, the thicker the thread can be.
Thick yarn is often used for large-scale embroidery or for decorative effects such as ruffles and fringes, while thinner yarn is suitable for fine details and outlines. Therefore, when choosing embroidery thread, it is important to match the type of project and the fabric or canvas.
To begin, divide your thread into three strands. This way, your yarn won't be too thick, allowing you to create very intricate designs. Good embroidery thread is available from a wide variety of retailers, and many qualities are perfectly adequate for beginners. However, if you're looking for a beautiful finish and, above all, clean threads, I recommend Anchor embroidery thread , as that's what I use.
Sometimes, however, old embroidery items are still lying around in one of grandma's or great-grandma's craft cases, ready for a second chance.
Embroidery stabilizer
To transfer an embroidery pattern onto a fabric of your choice, simply trace it or print it onto water-soluble stabilizer *. Water-soluble stabilizer is a special material used in embroidery and other craft projects. It is made of a fabric that dissolves when immersed in water. This makes it a practical and effective tool for embroidering on delicate fabrics such as silk, lace, or other fine materials.
The non-woven fabric is self-adhesive and applied to a backing paper; with a little care, it can be inserted into the printer and printed on.
Then the water-soluble fleece is placed on the fabric to be embroidered, in order to stabilize and protect the fabric.
The great thing about this method is that you can simply wash the stabilizer out with water after embroidering. Let the fabric soak in for a while and then gently rub the stabilizer with your hands. Afterwards, lay the project out, let it dry, and then carefully steam it.
There are various types of water-soluble nonwoven fabric that differ in texture, thickness, and dissolution rate, and here the recommendation is unrivaled: the nonwoven fabric from MADEIRA. The Avalon Plus Wash Away * is a robust nonwoven fabric with which we have had the best experience and on which the printer (Brother) was able to print very cleanly.
If the template is in A4 format, the fleece is additionally glued to a regular sheet of paper. This allows the printer to feed the fleece even more cleanly; just a few strips of glue are sufficient, and the printer will accept the fleece from the normal feed without any problems.
Freestyle hand movements are also possible on the fleece.
Just be careful with your choice of pen, because a soft pencil can leave streaks and some pens bleed ink.
A waterproof fineline pen is a good idea.
Needles & Co
Embroidery needles are an essential tool for embroidery and other craft projects. They are used to pull the embroidery thread through the fabric, creating patterns and designs. There are various types of embroidery needles, differing in size, shape, and purpose. Therefore, choosing the right needle can be quite important.
Embroidery needles are available in various sizes, and the choice always takes into account the project and the thickness of the yarn.
A fine needle is suitable for thinner yarn, while a thicker needle is suitable for thicker yarn and thus adapts to the project.
A needle threader like those from earlier times comes in handy here, because even getting three strands of yarn into one needle eye can be nerve-wracking.
It is important to select the correct needle size for the specific project in order to achieve optimal results.
Another important characteristic of embroidery needles is their shape. There are various shapes of embroidery needles, including straight needles, curved needles, and special needles for specific embroidery techniques, such as blunt needles for Hardanger embroidery (a style of embroidery originating in Scandinavia).
So, we can conclude that the shape of the needle is crucial for the type of embroidery. Don't worry – a regular medium sewing needle with a not-too-large eye is sufficient to get started.
Needles are primarily known for their durability and resilience, but plastic and bamboo options are also available. Regardless of the material, it's essential to store needles properly. Hand-carved and embroidered (how lovely!) needle cases are perfect for this, providing not only storage for all your needles but also a sense of protection during your workflow.
As with thread, the rule is: the coarser the fabric, the thicker the eye of the needle can be.
With a finer fabric, a hole that is too large would be left.
Nice to have
Hobbies become passions, and so the passion for hand embroidery can naturally be taken to the extreme.
Basically, accessories such as small sharp embroidery scissors, a fineliner or laundry pen and a thimble provide a solid foundation.
But there are a few more tools available to make embroidery even more enjoyable. Besides good reference books and great online patterns, more intricate work can be made even more enjoyable with a kind of 'helping hand' and a magnifying glass.
Perhaps the most beautiful sight is one's collected yarn in a wonderful box, neatly arranged on spools. This too is an accessory, and it not only ensures order but also adds an extra spark to the joy of taking time for the passion of hand embroidery.
For the yarn at Schwalbenliebe, a workshop find from Grandpa's garage was chosen. It's an old waterproof emergency suitcase box from the 1960s. It probably served as a first-aid kit for a long time and will now house yarn treasures.
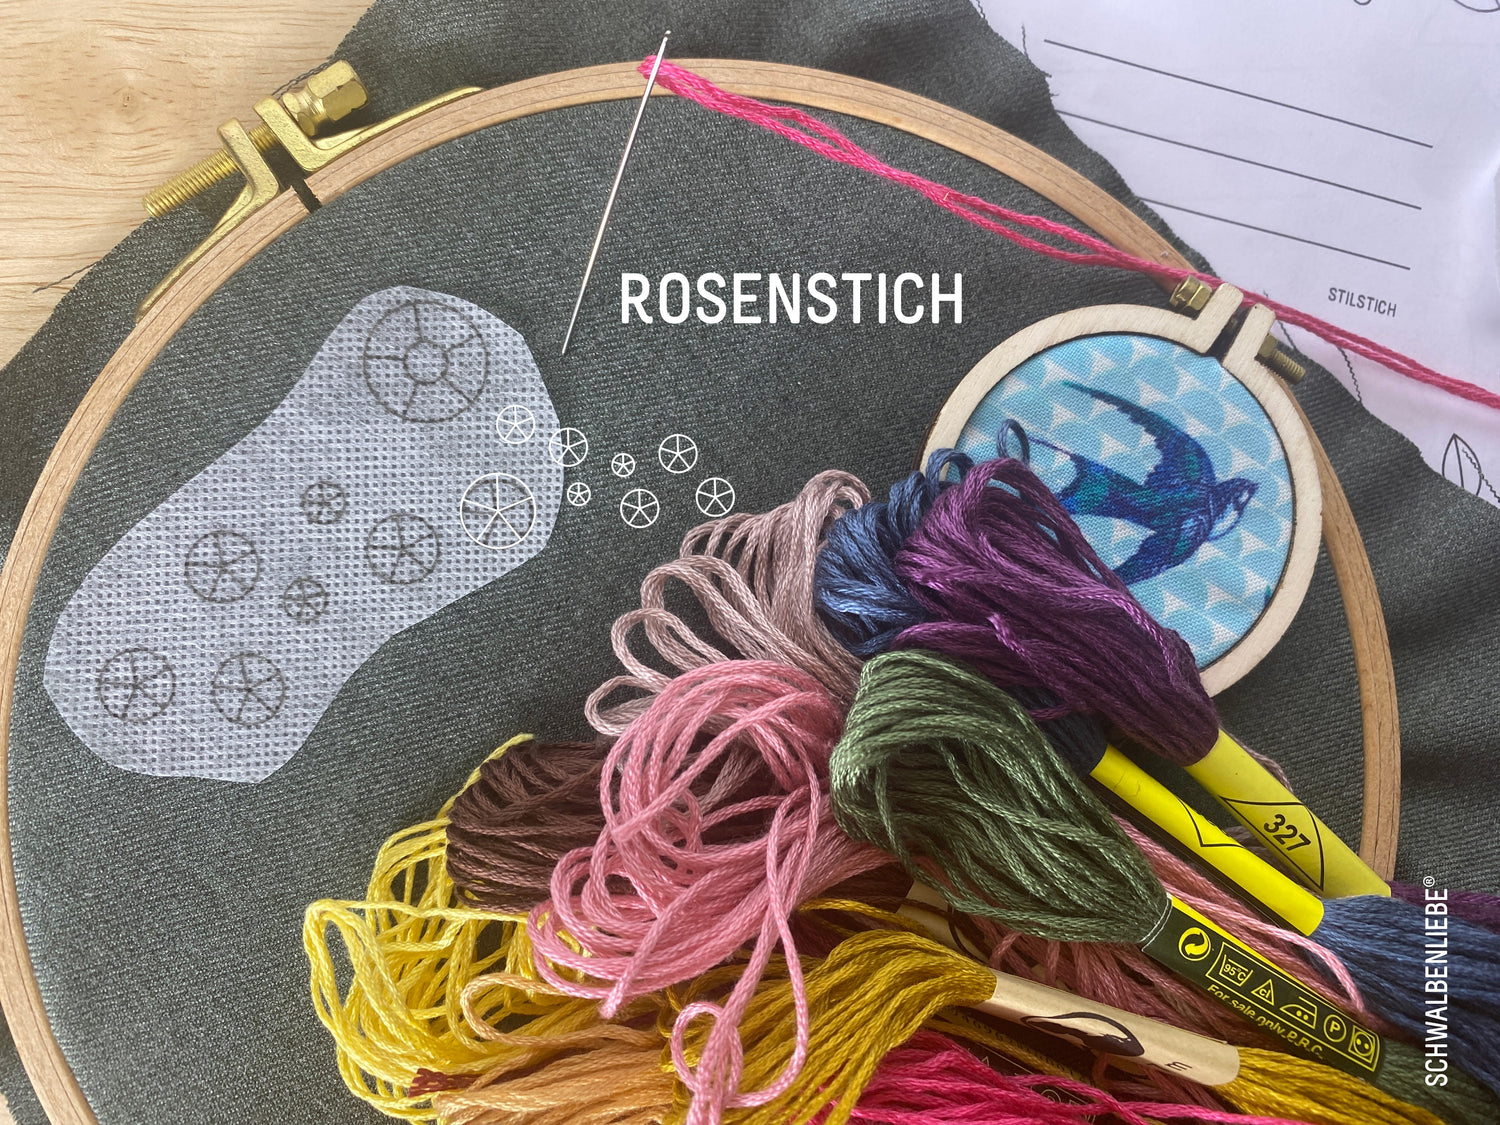
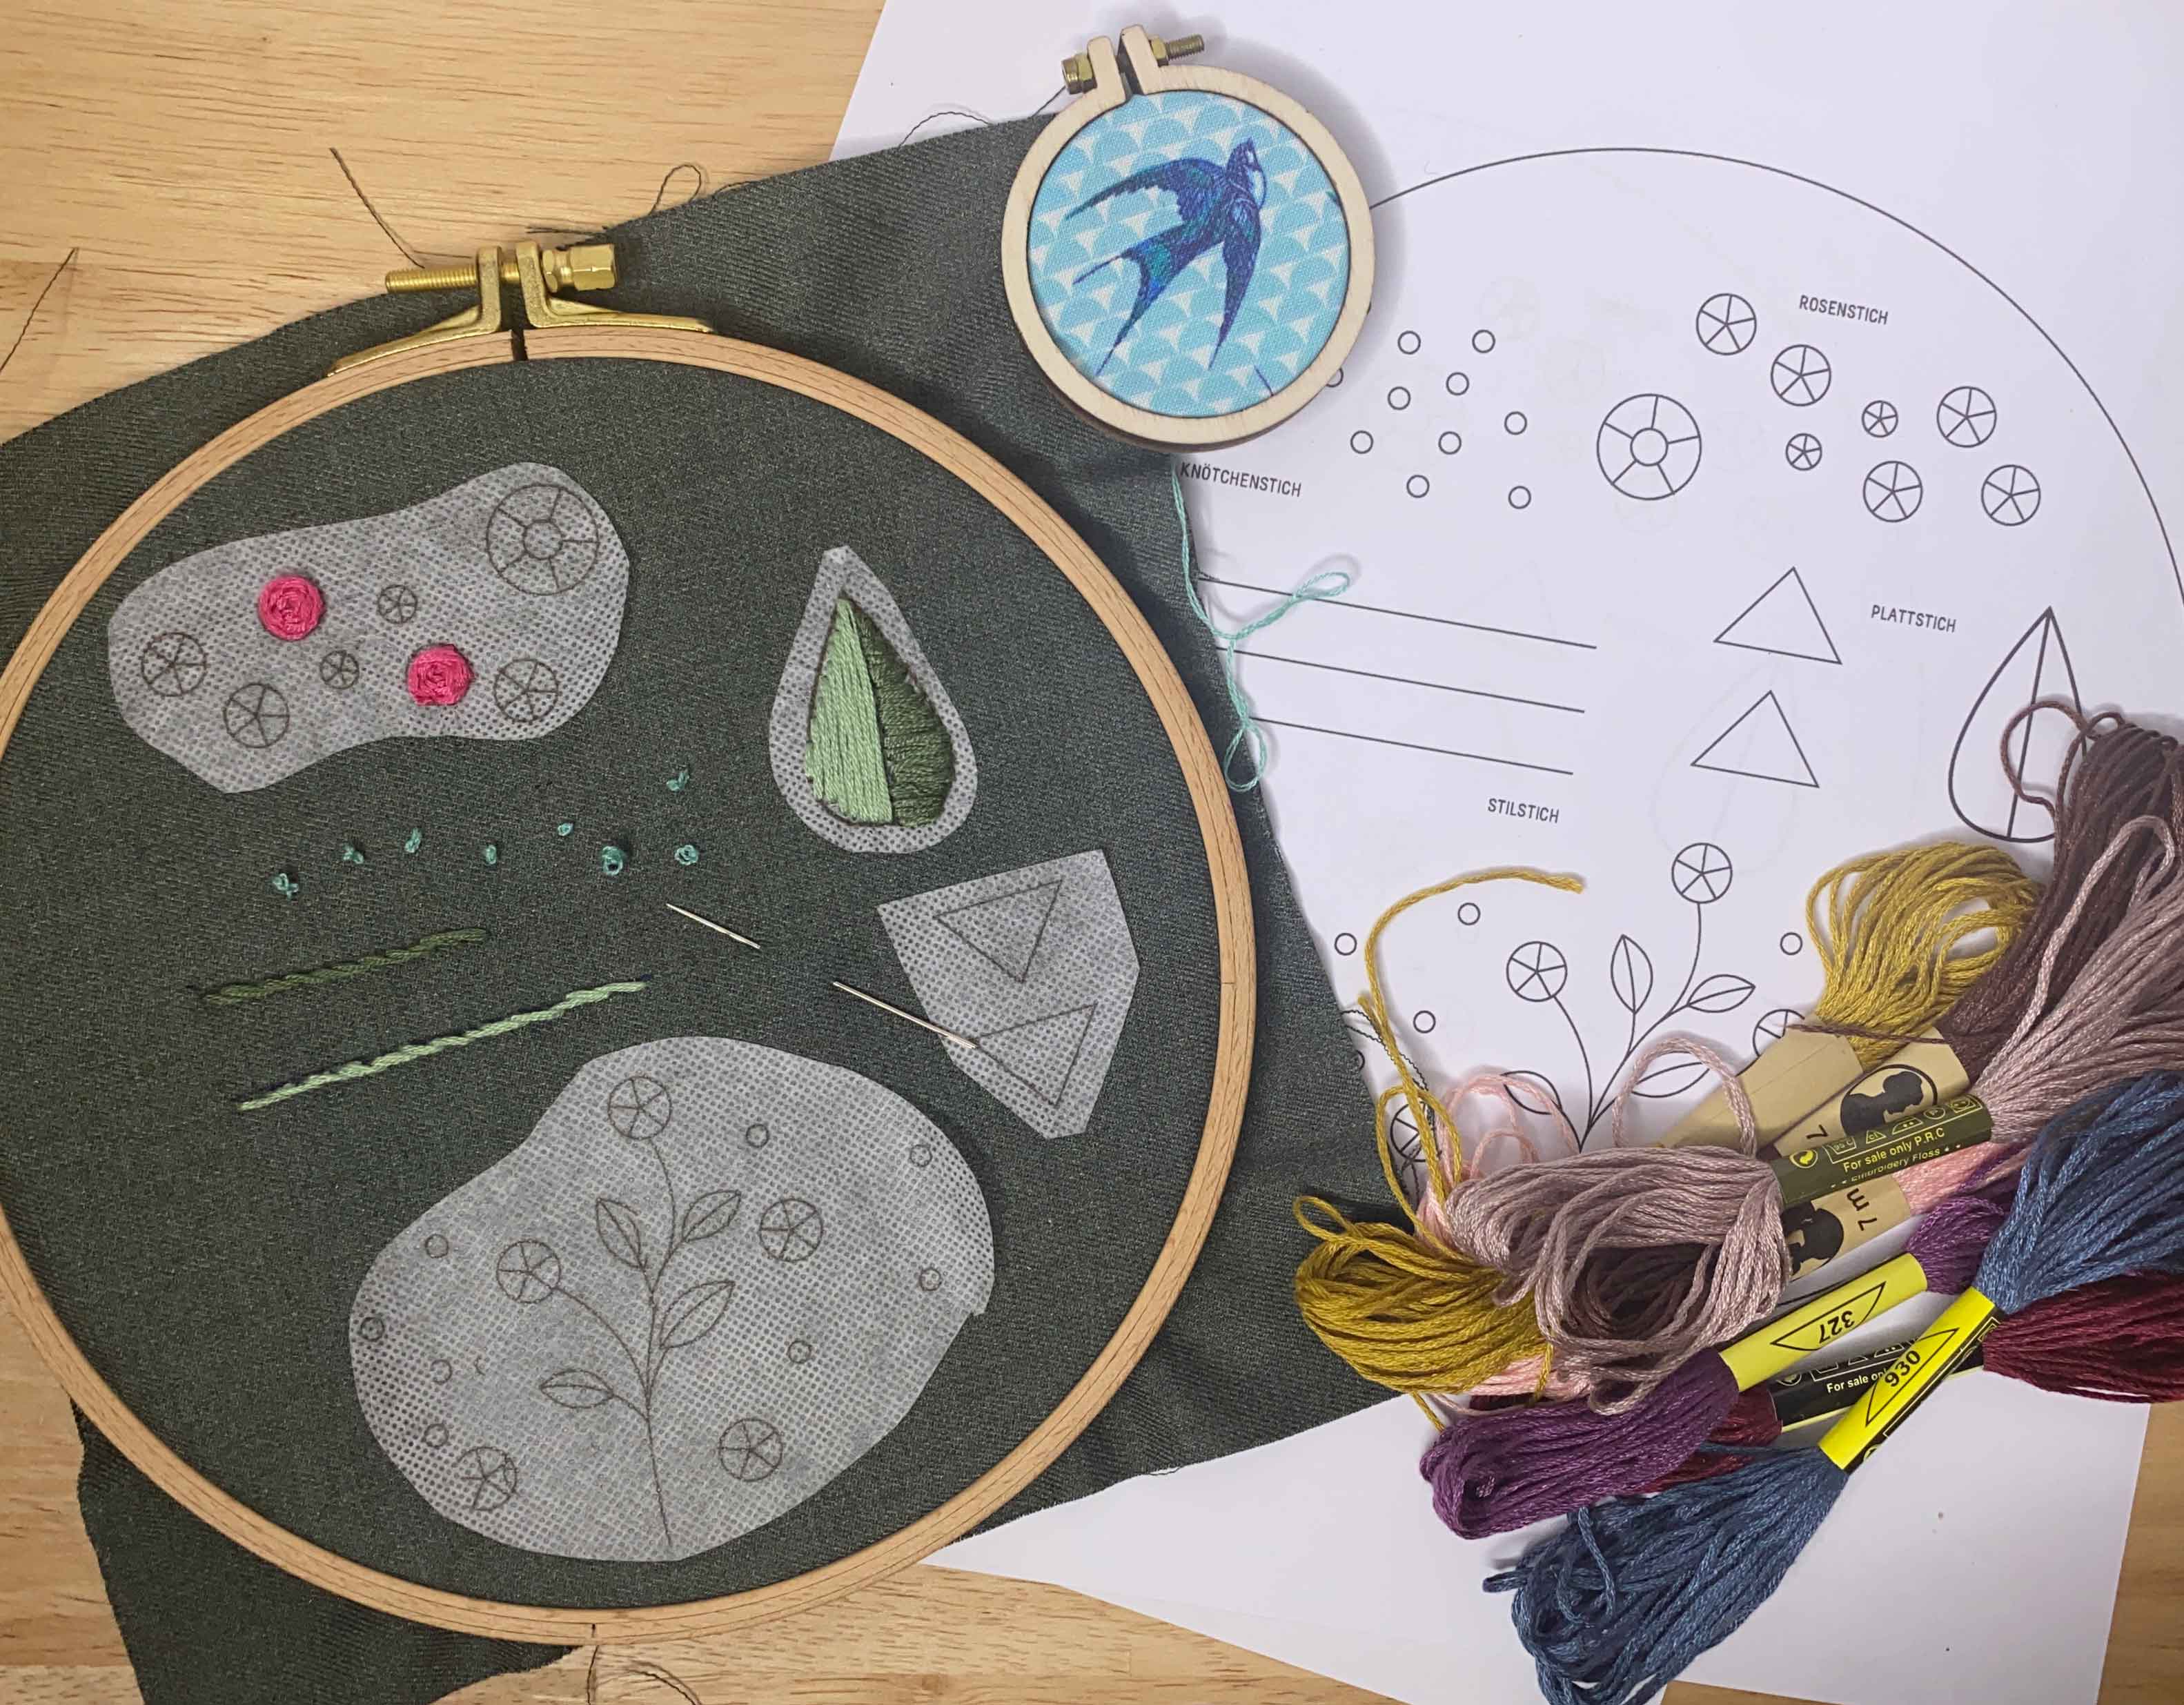
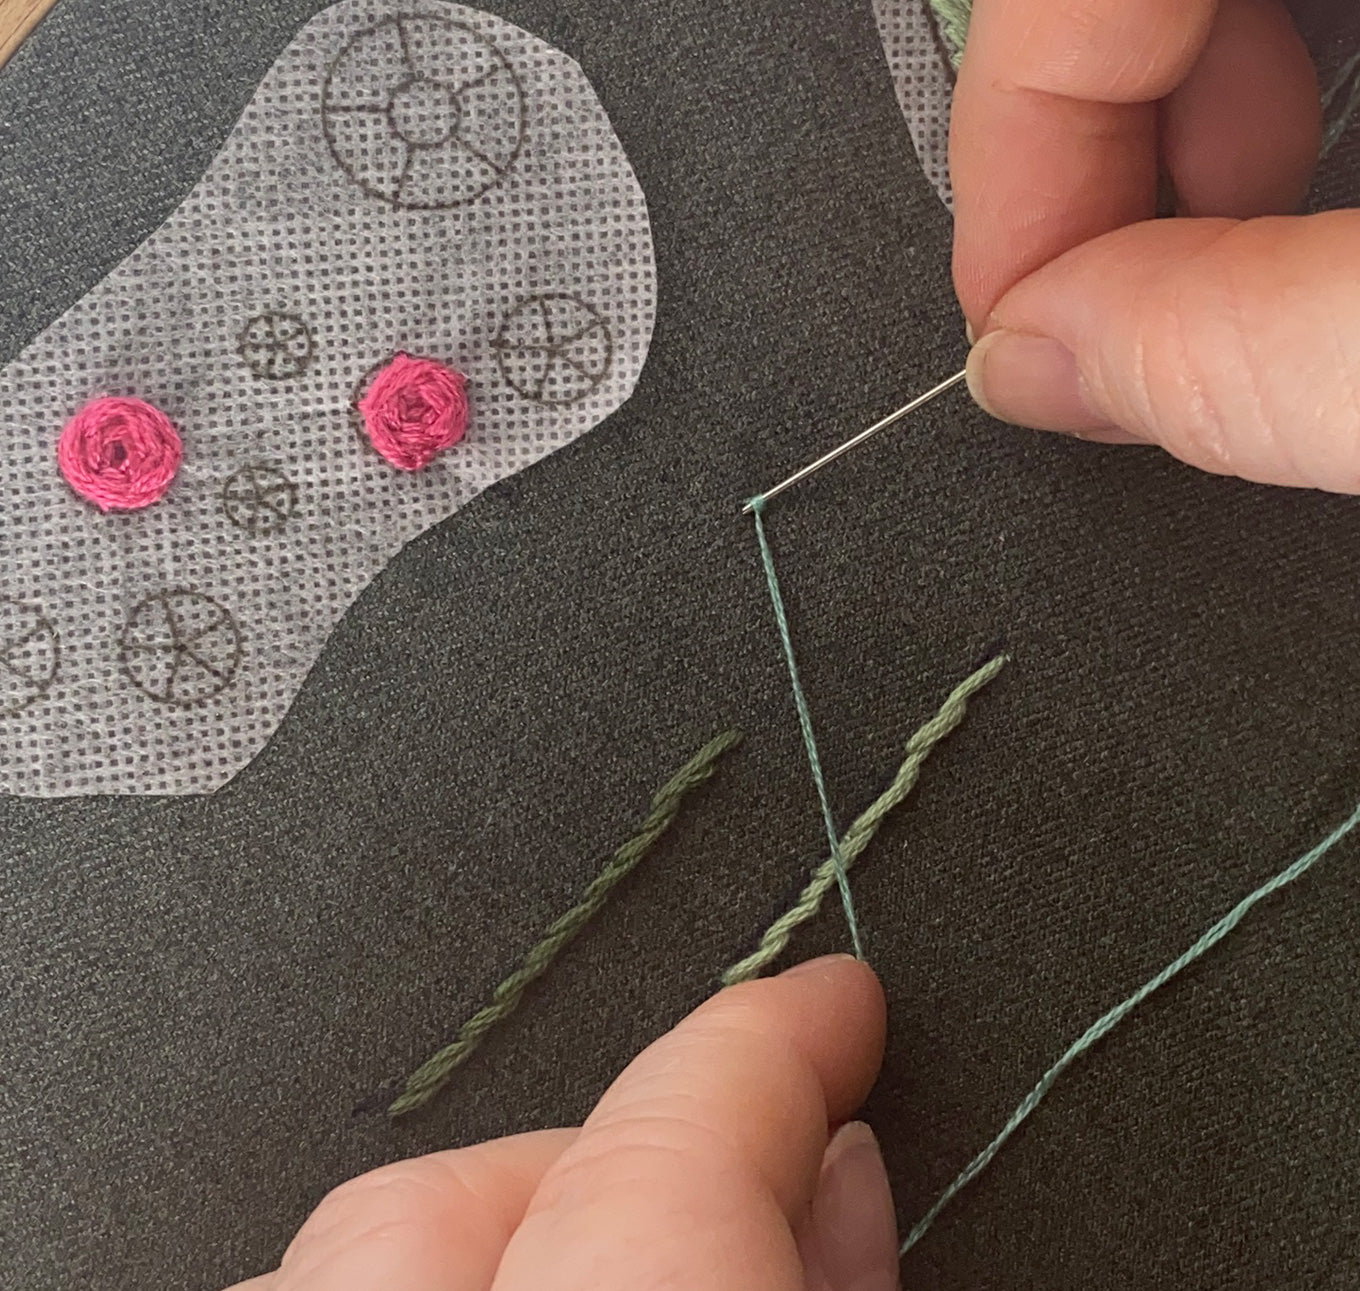
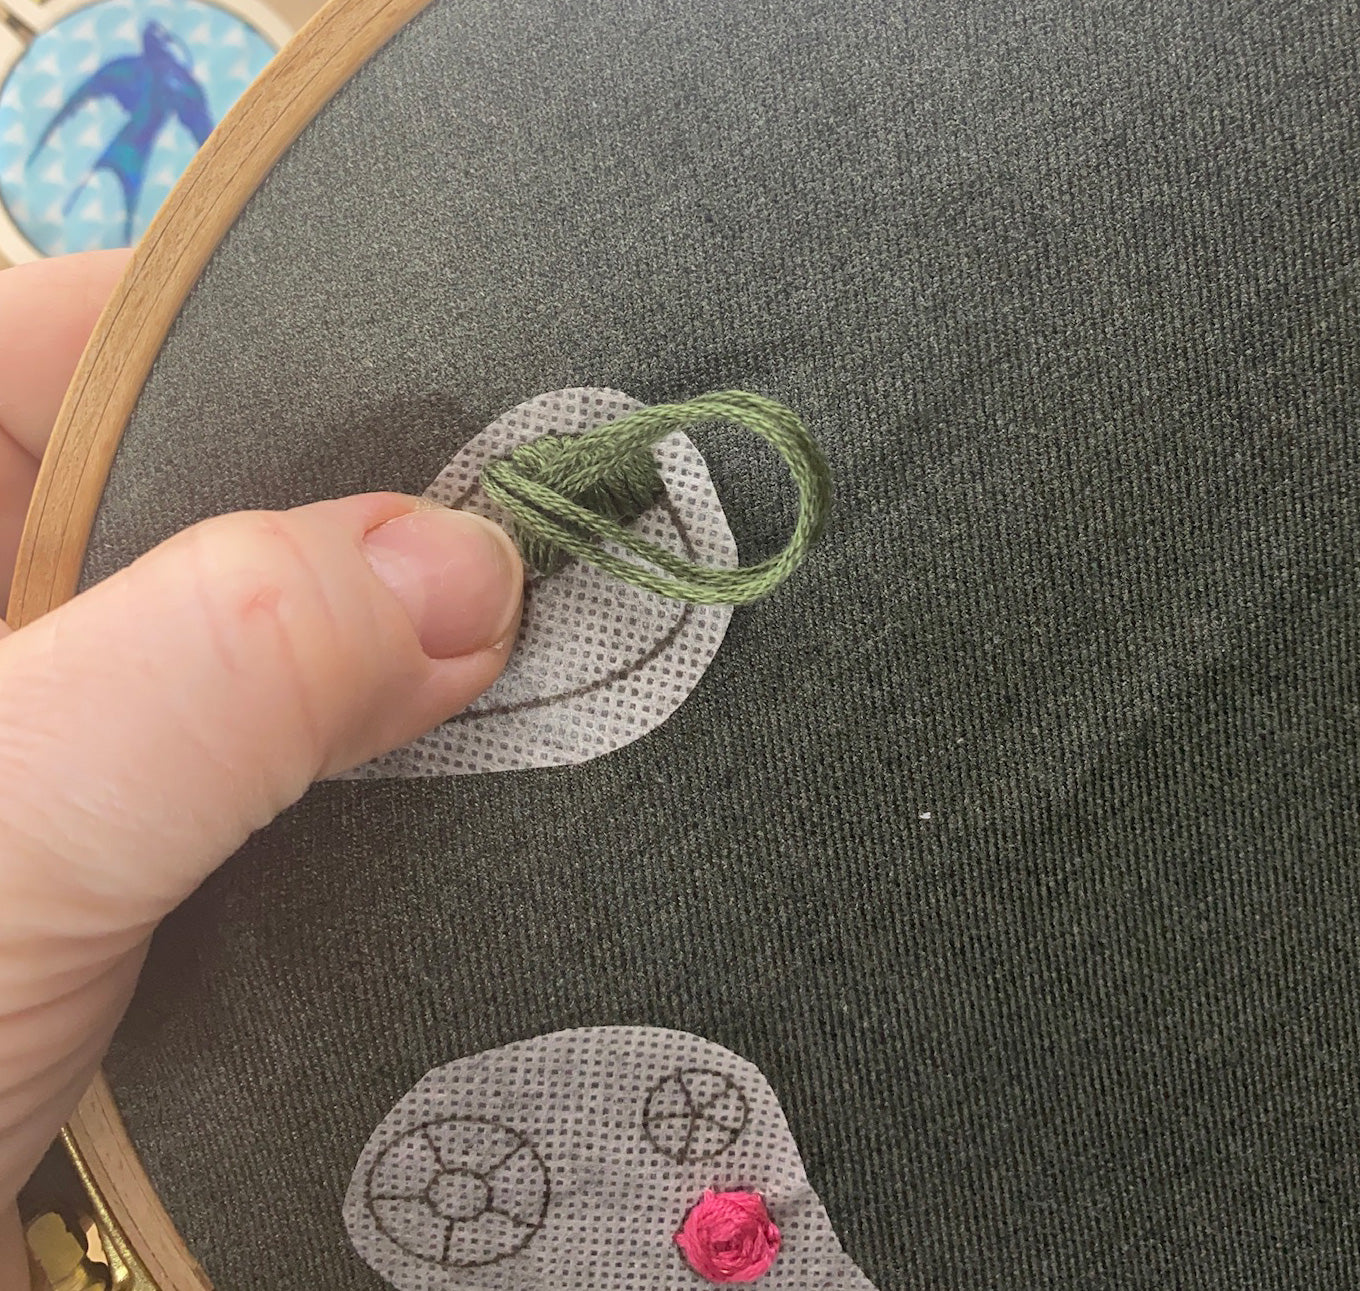
❥ THE WONDERFUL WEBROSE OR ROSE STITCH
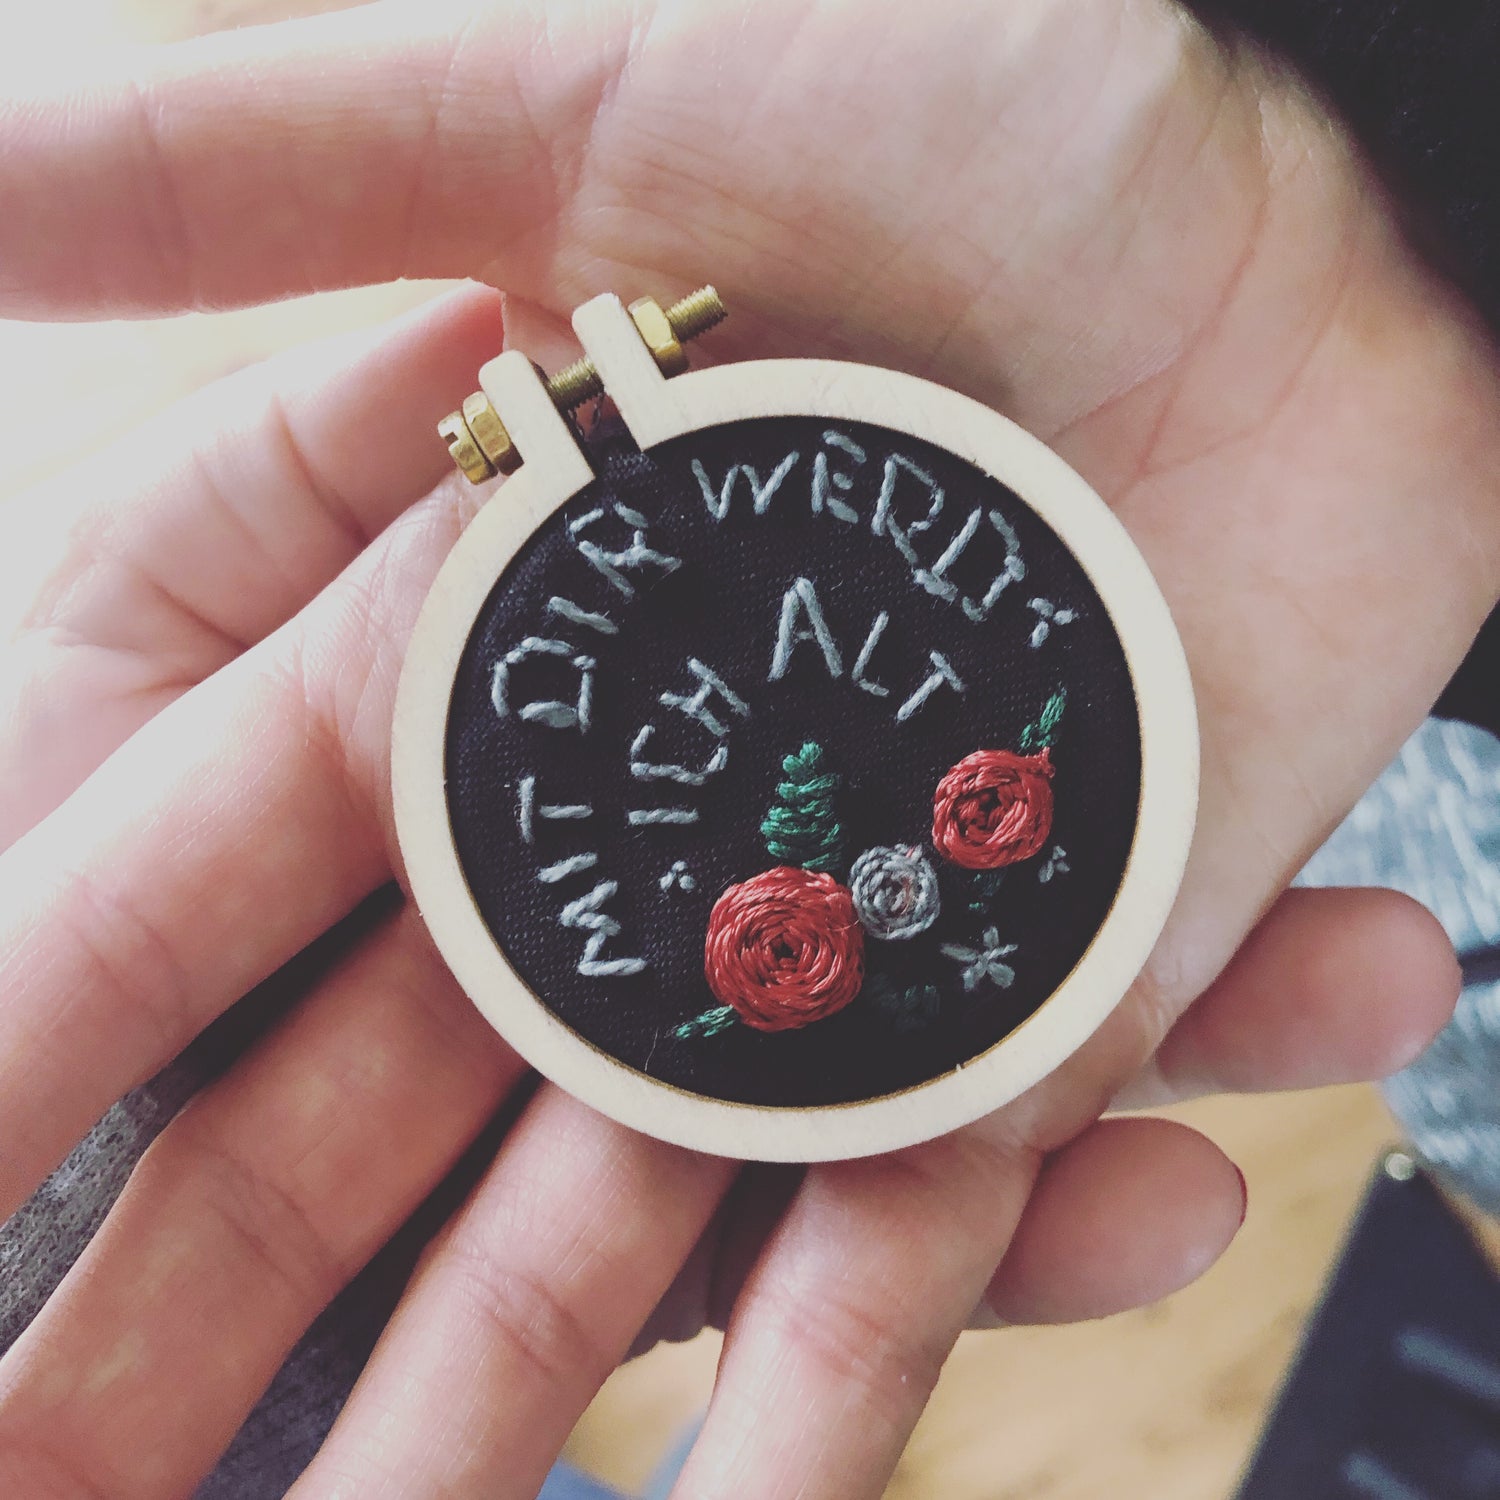
My absolute favorite among the simple embroidery stitches, which with a little practice is a fantastic option for all sorts of playful embellishments on jackets and accessories, is the rose stitch, or woven rose. The rule here is: the thicker the yarn, the fuller the rose. The stitch is also typically darker in the center of the flower and lighter at the edges to simulate the shadows and depth of the bloom.
-
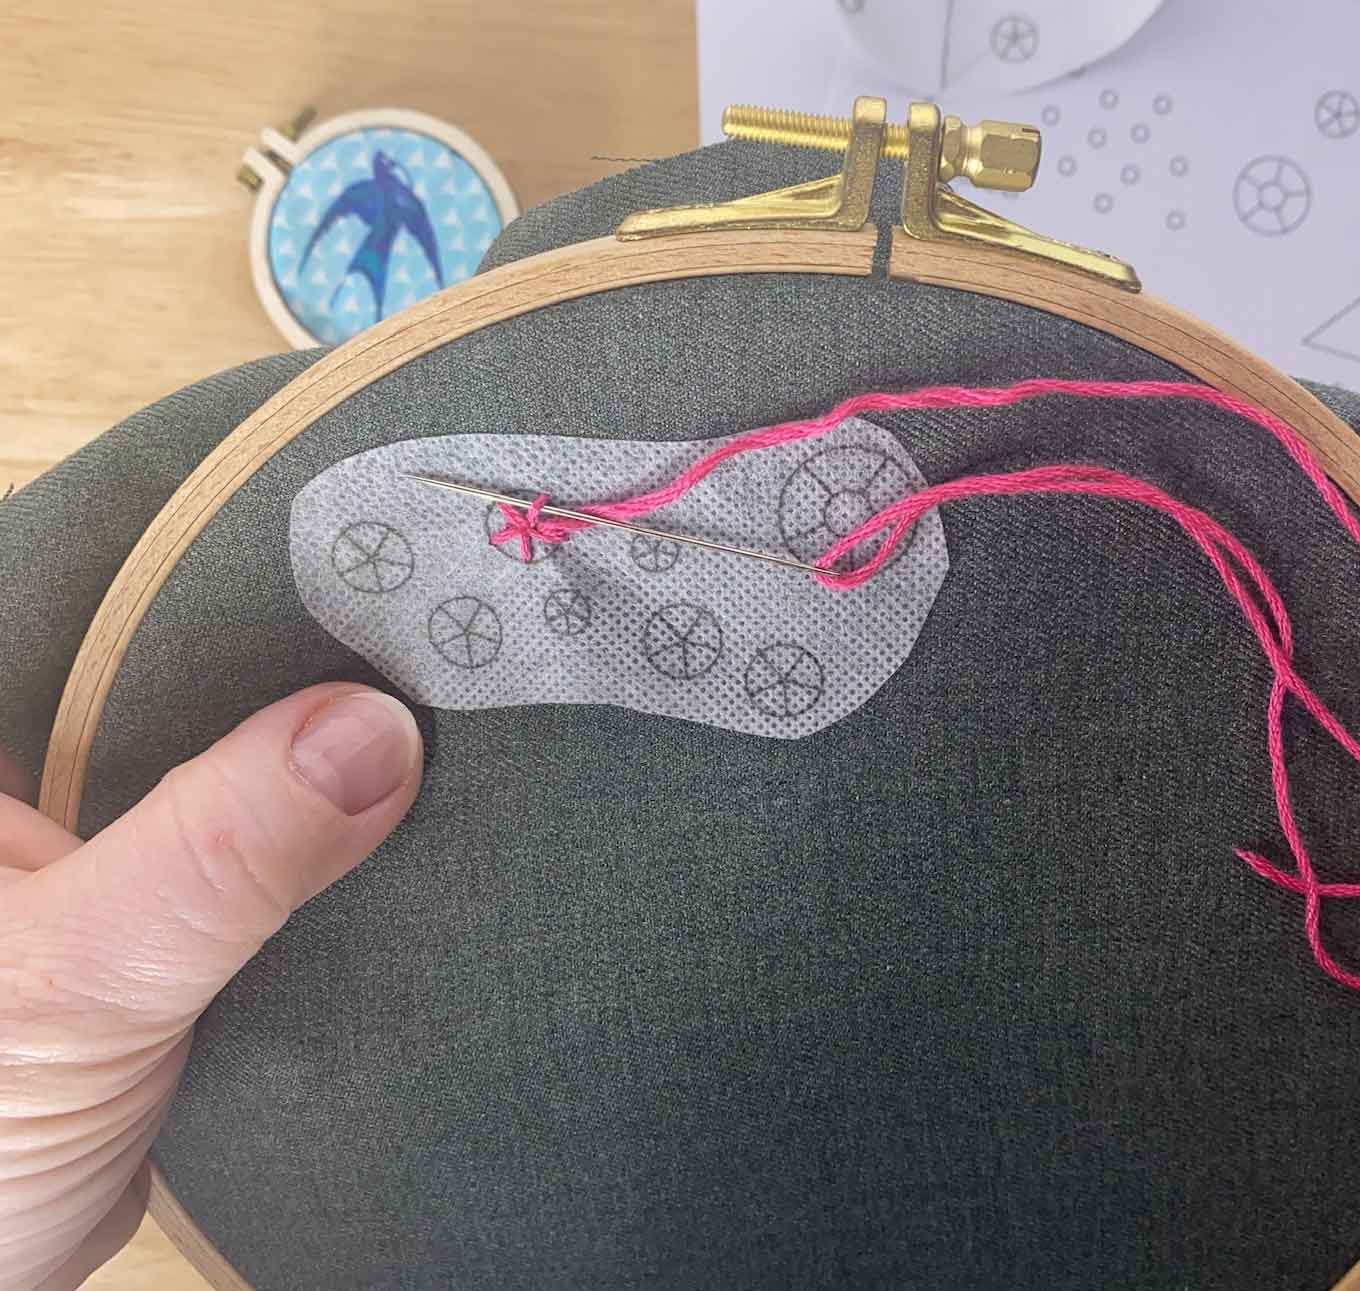
First, draw a circle and embroider 5 'spokes' evenly spaced from the outside in.
-
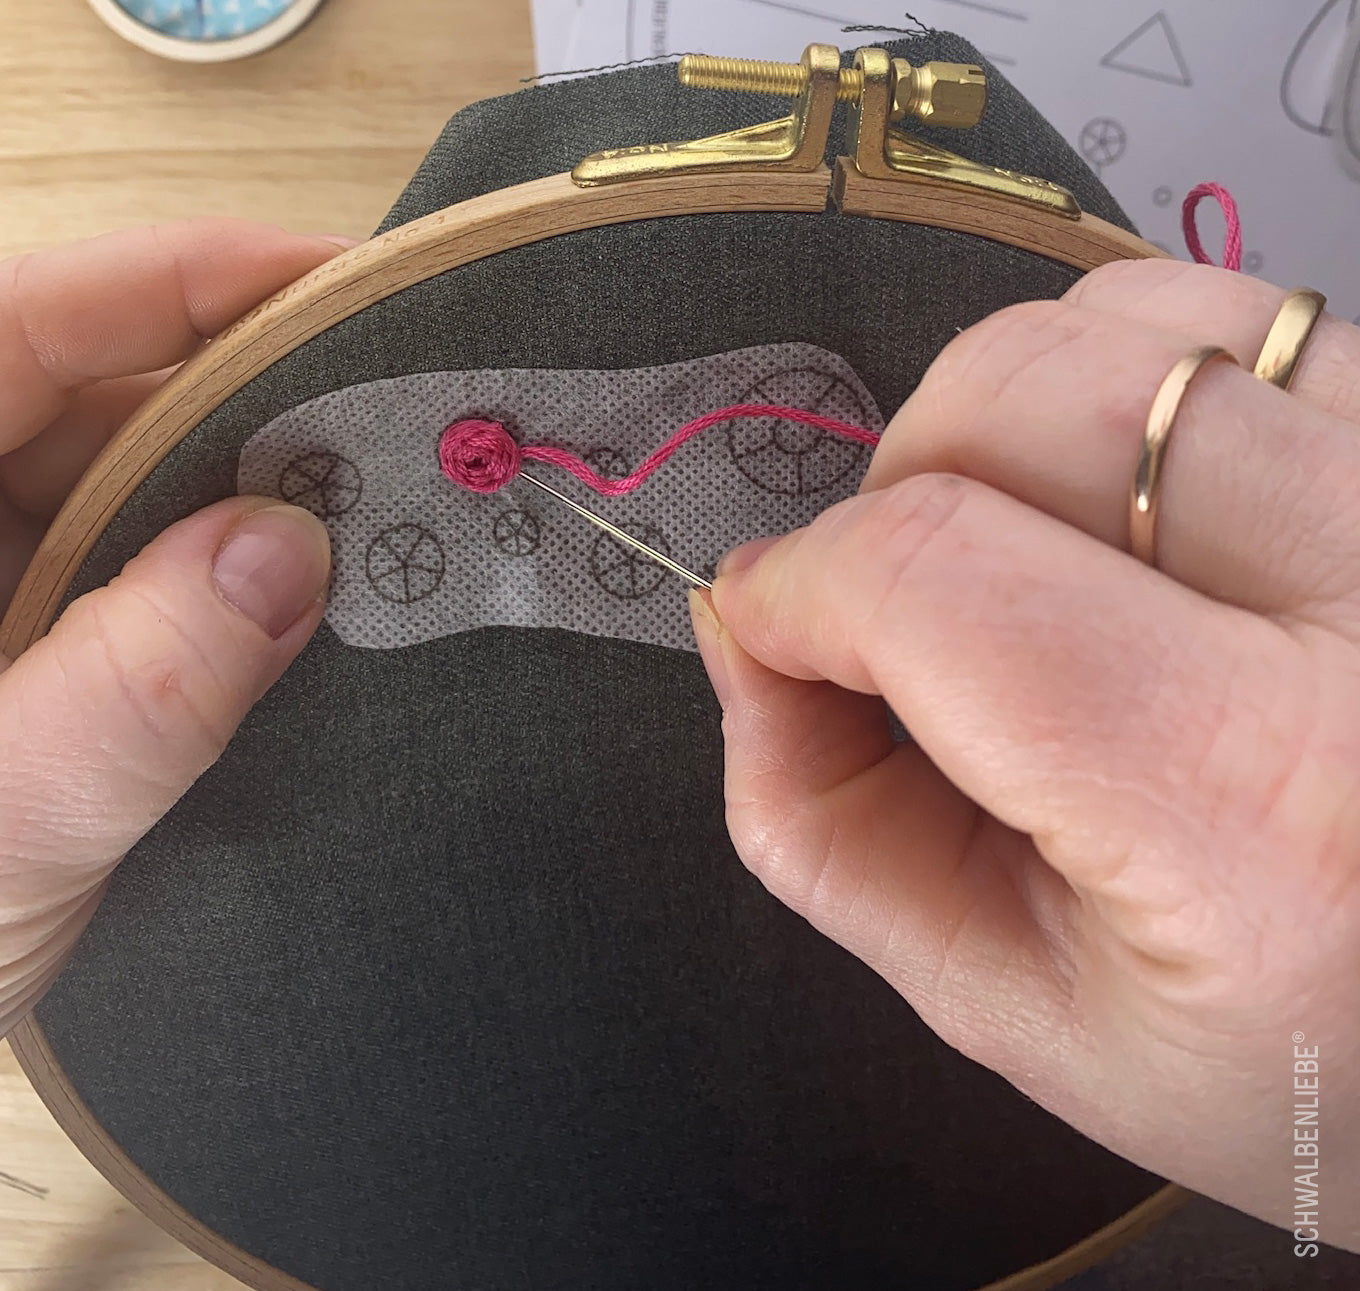
Next, you weave your rose by placing the thread under one of the spokes and pulling it over the next. You continue pulling over and over the spoke until your rose reaches the end of the basting stitches, then knot it on the back.
-
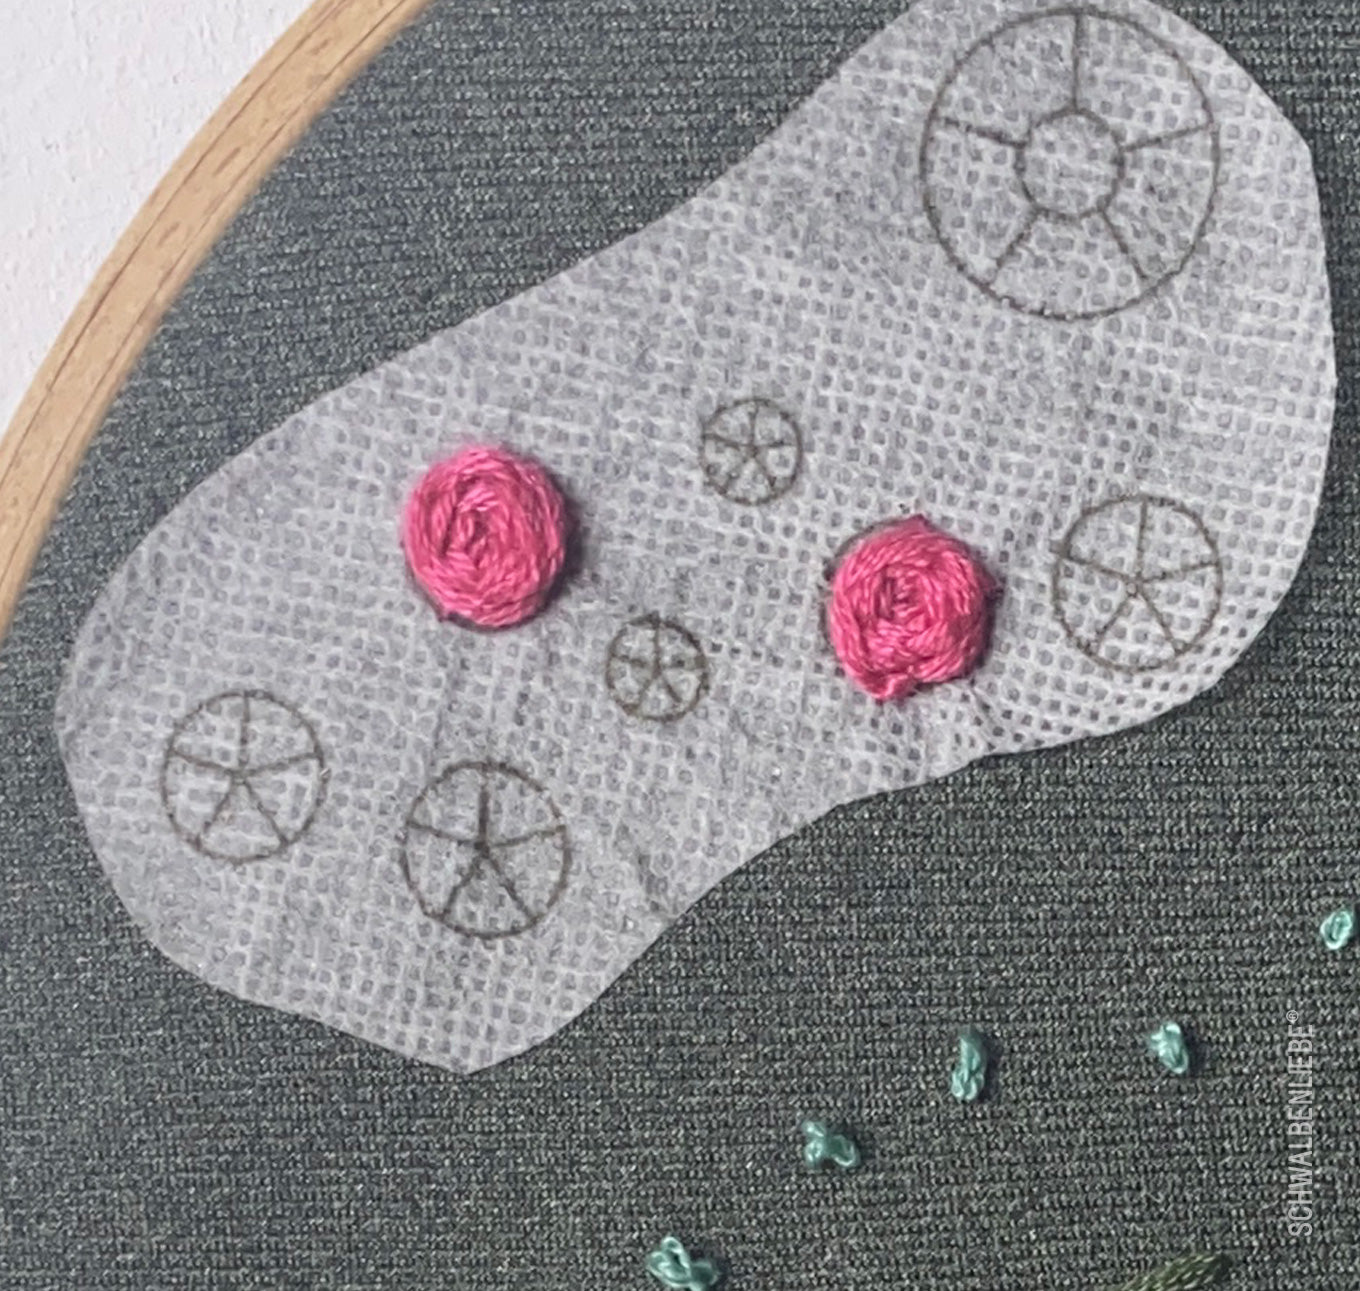
The length of the 'spokes' allows you to embroider your rose in any size you like.


❥ THE FOLLOWER STITCH
The French knot, also known as the loop stitch or bouillon stitch, is primarily used to create three-dimensional and textured effects on fabrics. Its striking appearance is captivating, and it can be worked in various sizes and spacings to achieve different effects. Depending on how tightly or loosely the loops of the stitch are worked, it can create a flat or raised texture. In combination with other stitches, it can create wonderful textures.
-
The needle is inserted from the left through the fabric in the frame, the thread is wrapped twice around the needle and then reinserted next to the exit point.
-
The thread is then carefully pulled further, ensuring that the winding from the needle transitions neatly onto the fabric.
-
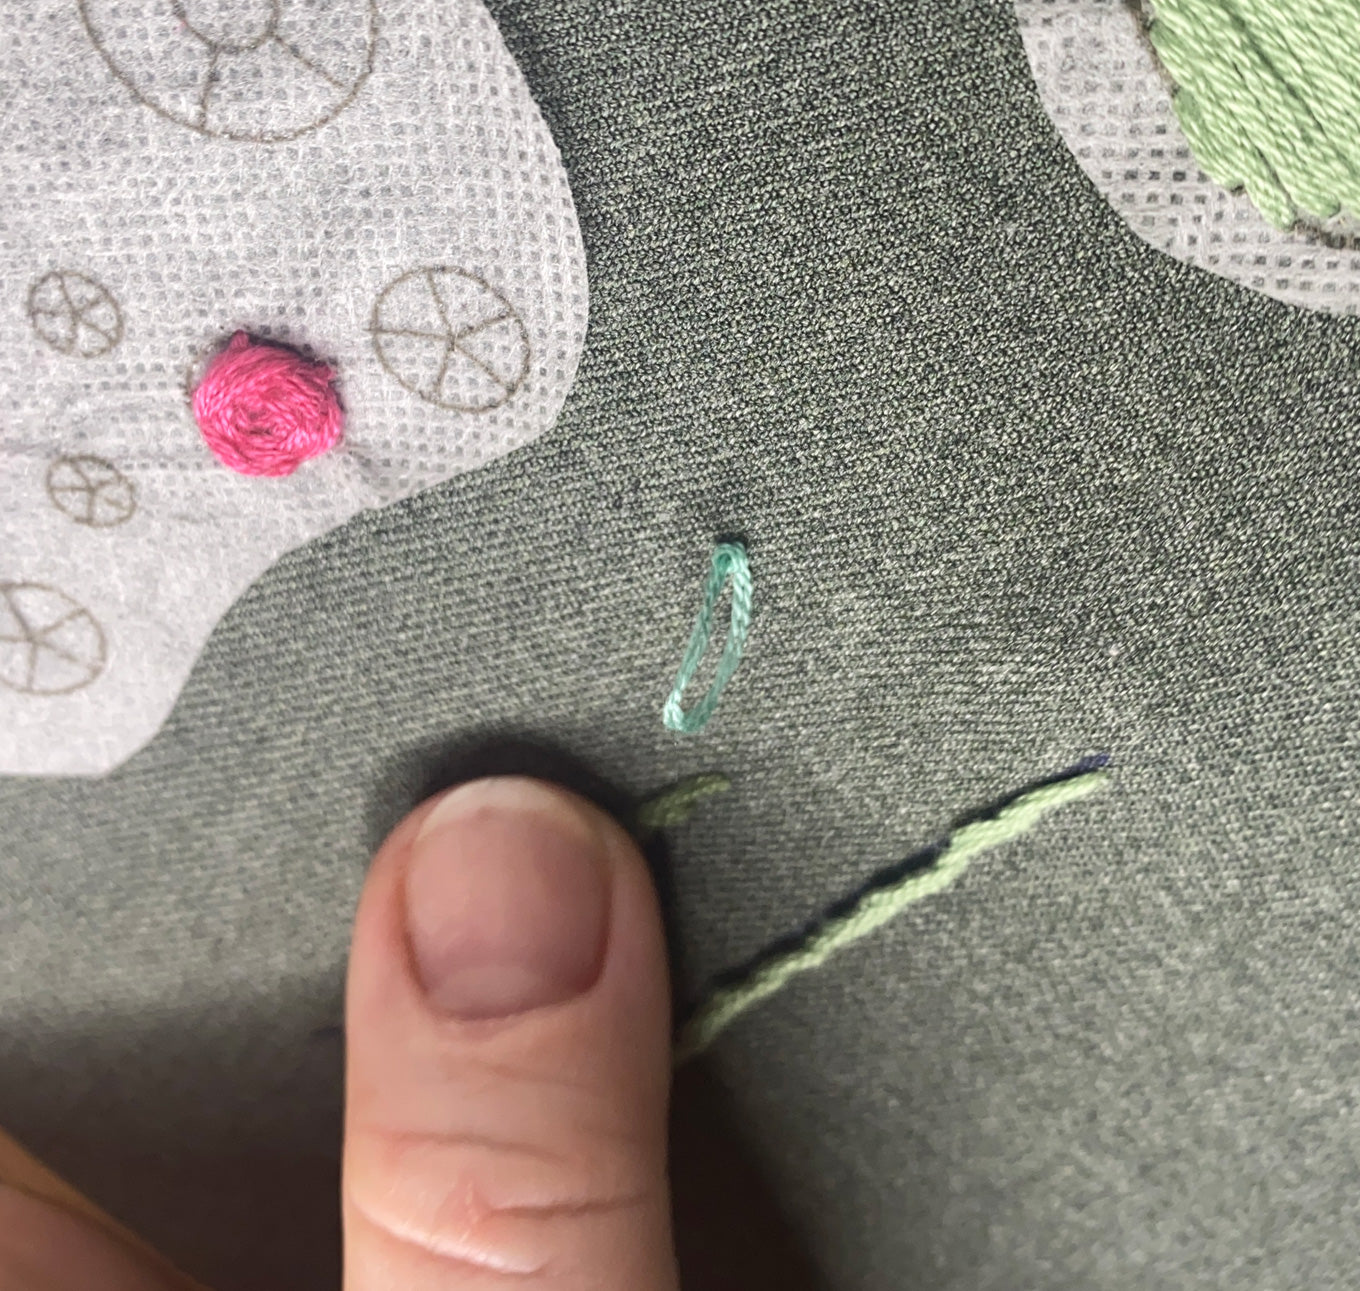
To prevent the knot from slipping when pulling, work slowly and gently press down on the insertion point from below with your finger.


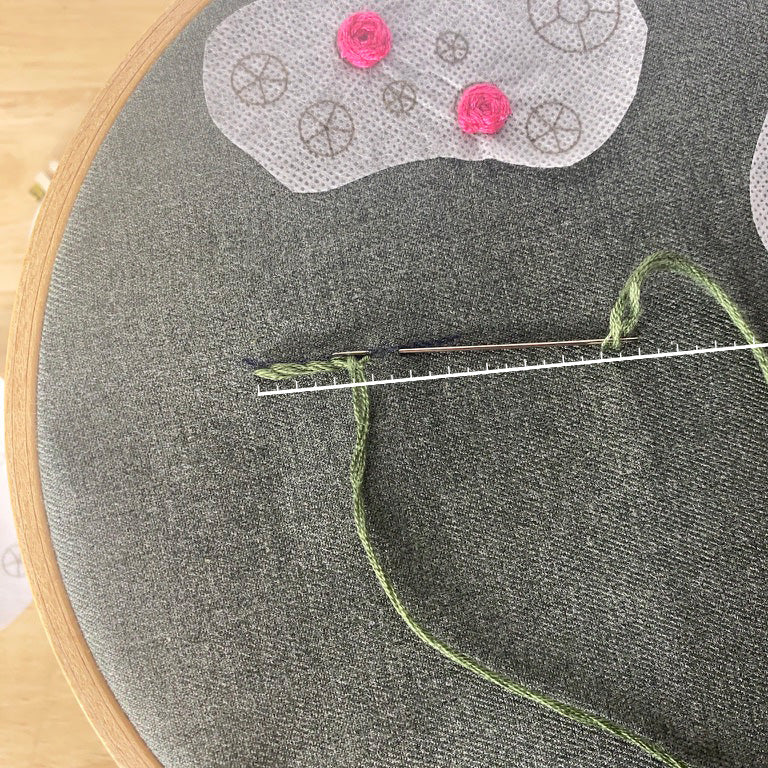
❥ THE STYLE STITCH
The Holbein stitch, also known as Swiss stitch or Swiss embroidery, is an embroidery technique often used for fine lines and contours in hand embroidery. It is known for its smooth and precise texture, which allows for the creation of detailed and realistic depictions of motifs.
First, a starting point for the stitch is chosen, and the needle is inserted into the front of the fabric. Then, the needle is guided to the back of the fabric, and a short stitch is made.
Next, the needle is reinserted on the front of the fabric, but this time near the end of the first stitch. The thread is then pulled to the back of the fabric, and another short stitch is made. This is continued until the desired contour or line is achieved, ensuring that the stitches are even and precise.
Great effects and patterns can be achieved by varying the spacing and size.
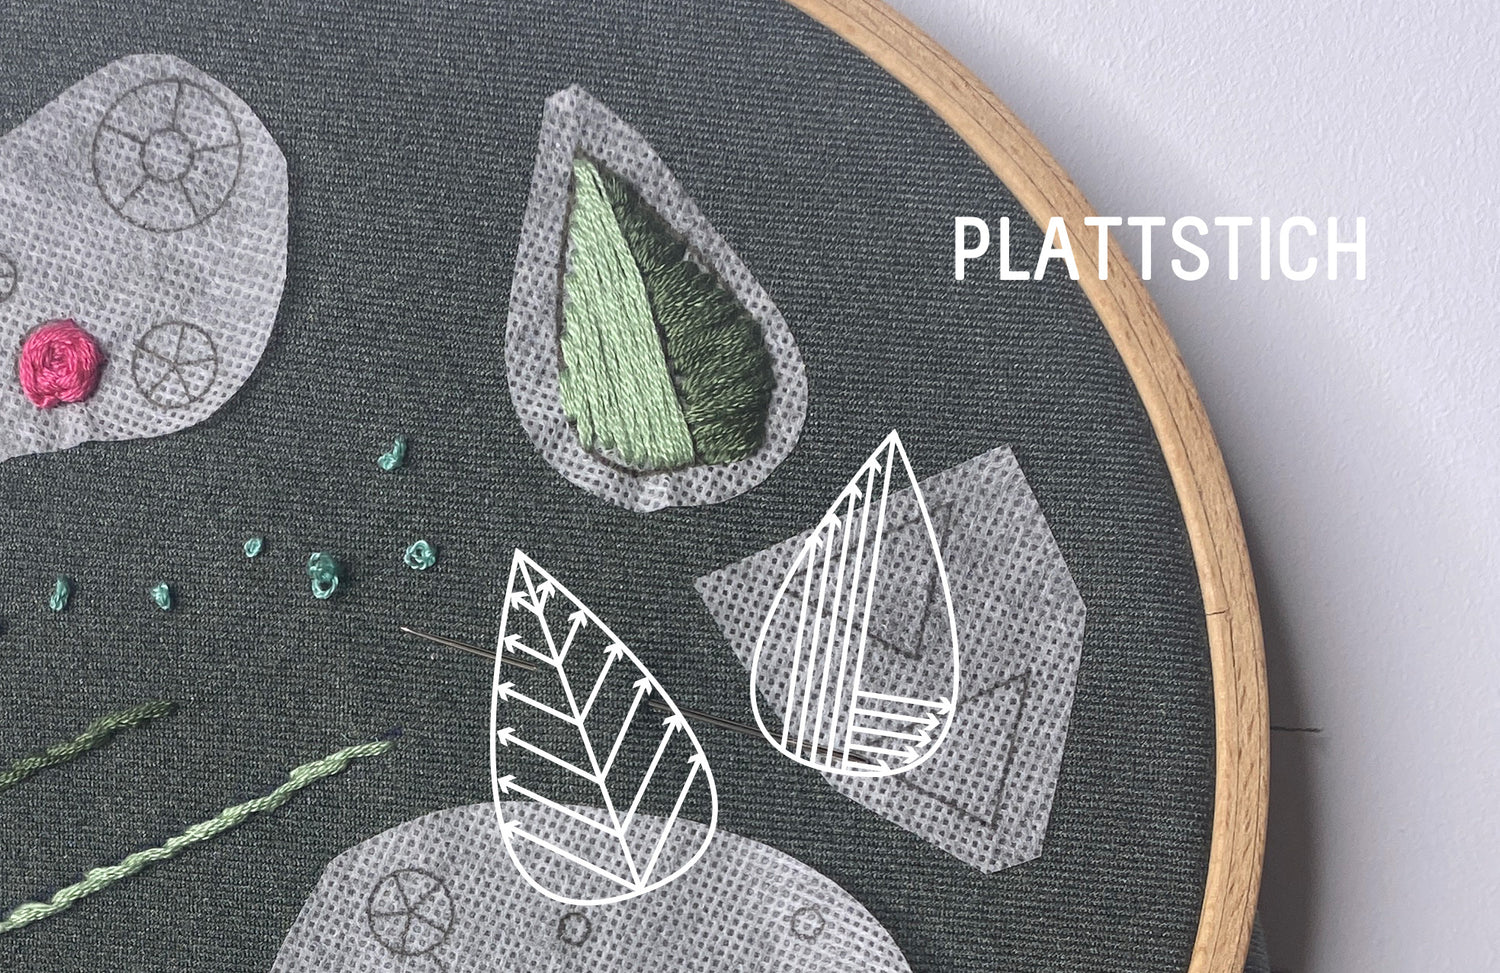
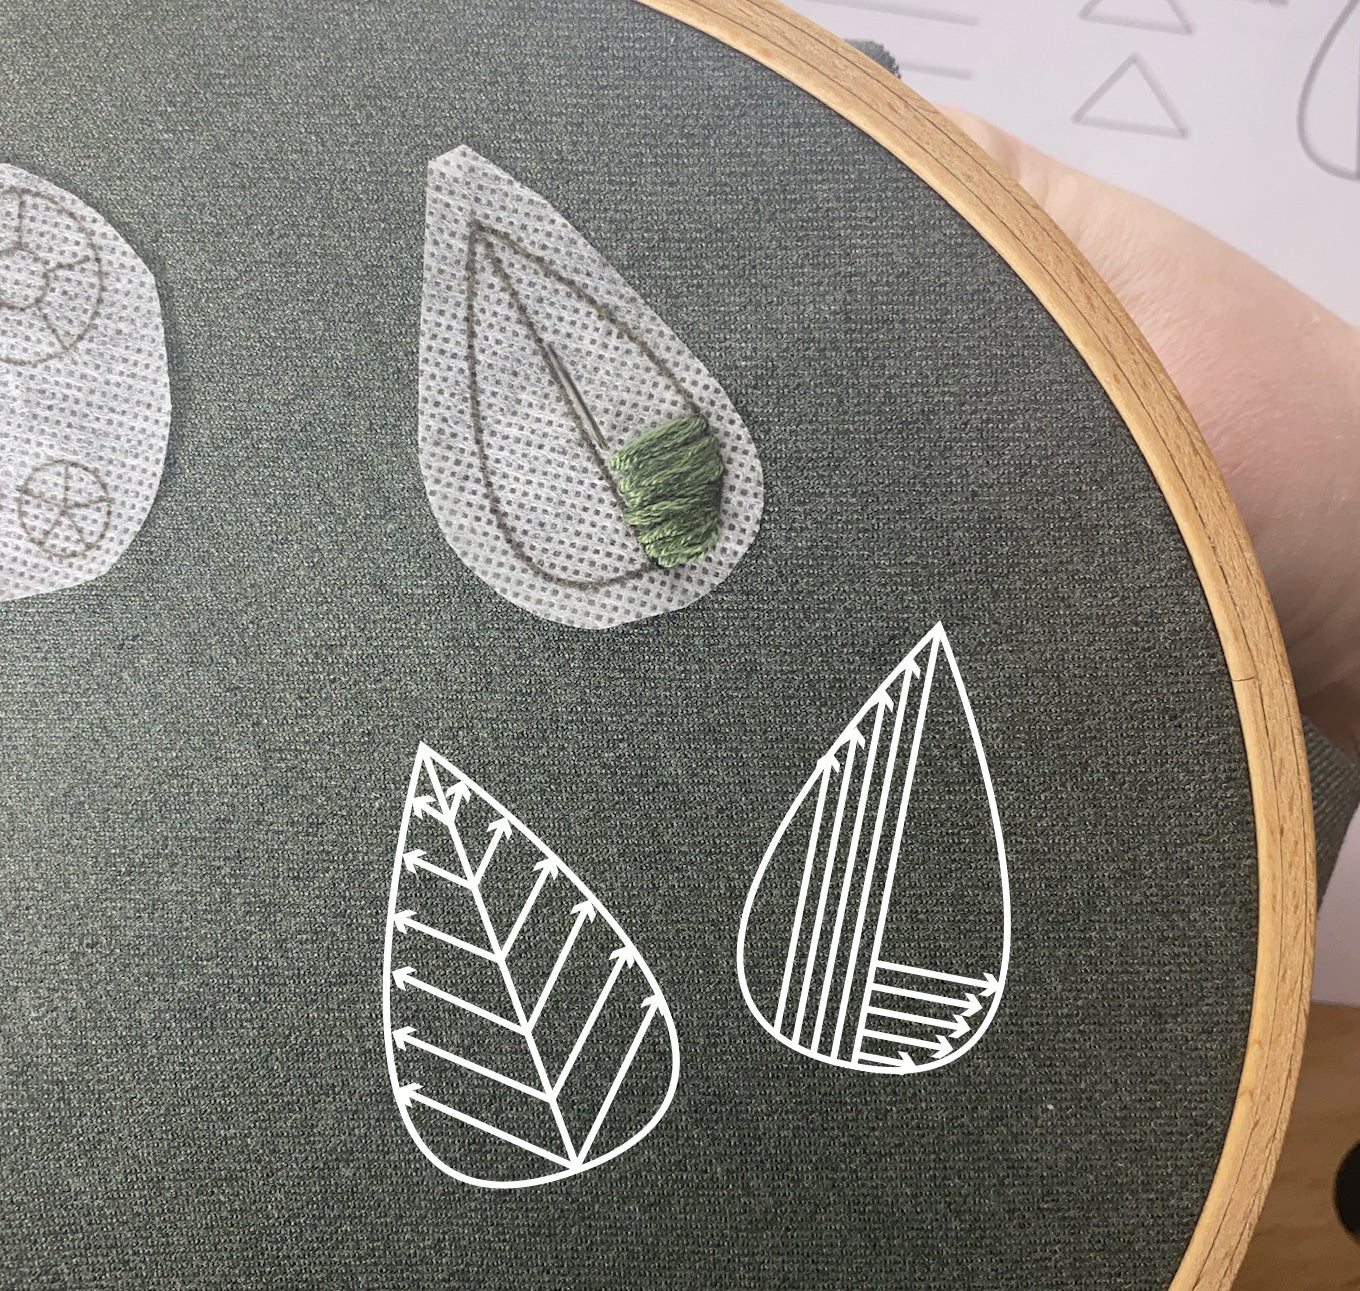
❥ THE ELEGANT PLATTE STITCH
The satin stitch is used as a fill stitch, and its parallel stitches create a very beautiful, smooth, and uniform surface. It is often used to create flat and even areas on fabrics and is particularly useful for backgrounds. The satin stitch can be worked in different directions and spacings to achieve various effects and patterns. It can also be combined with other embroidery techniques to create more complex designs and textures.
-
-
-
For the satin stitch, a thread is first attached to the back of the fabric and a starting point for the satin stitch is chosen. Then the needle is inserted on the front of the fabric and the thread is pulled to the back to create a small stitch.
Next, the needle is reinserted on the front of the fabric, but this time near the end of the first stitch. The thread is then pulled to the back of the fabric, forming another loop or stitch. This is continued until the entire area is filled, ensuring that the stitches are even and flat.


* AD | Affiliate links | Heartfelt recommendations that generate a commission through the use of the link.
Collapsible content
- Choosing a selection results in a full page refresh.
- Opens in a new window.