

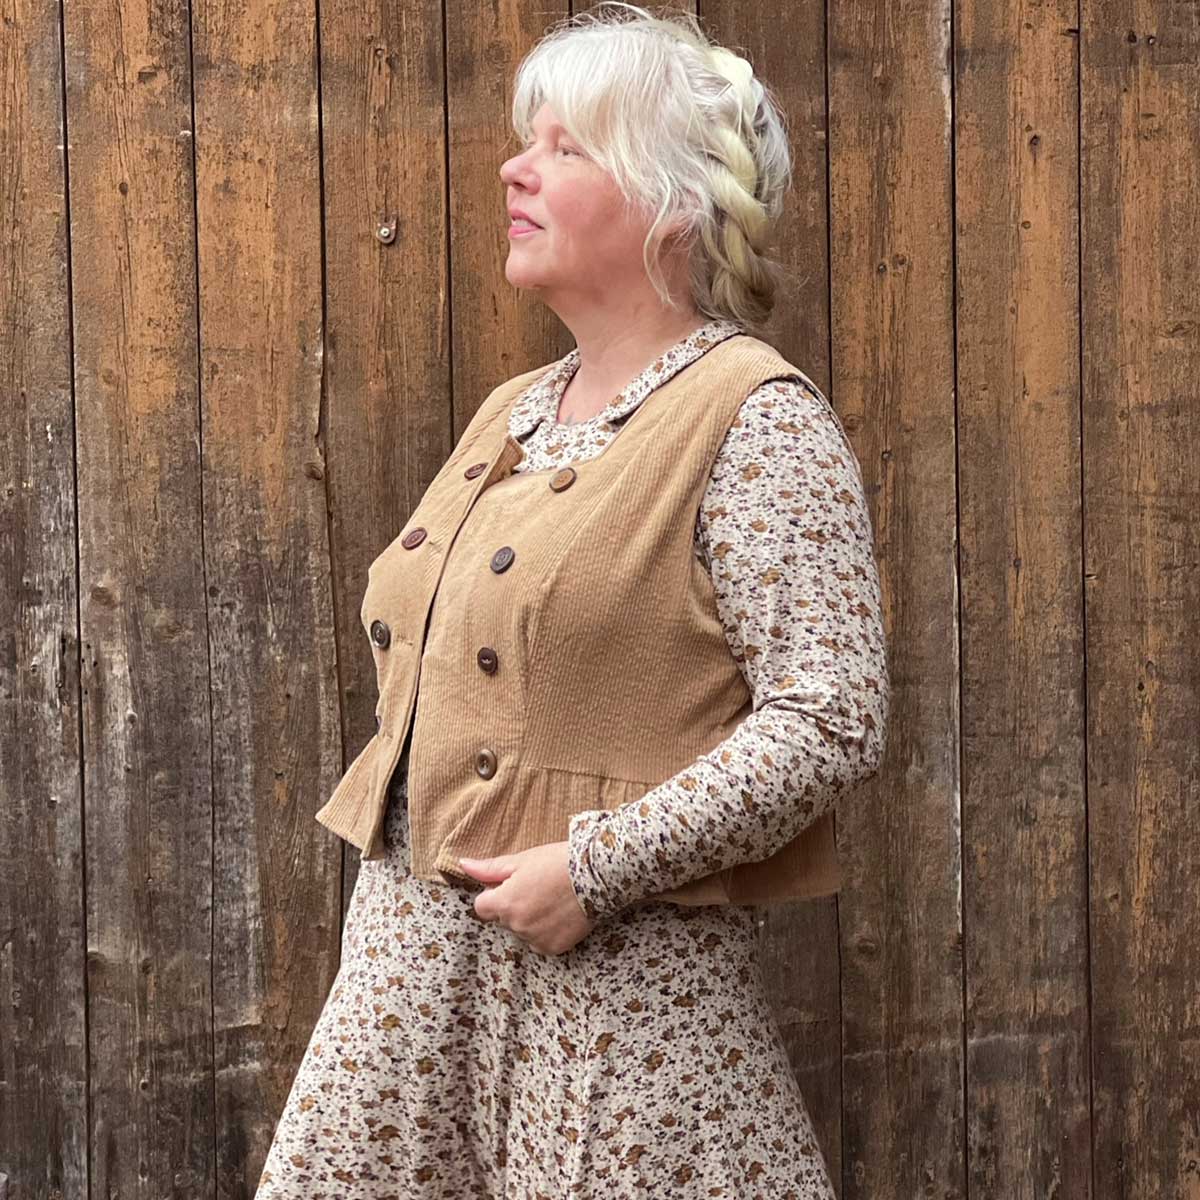
❥ IN ORDER TO BE IRREPLACEABLE ONE MUST BE DIFFERENT. SUN ON I. #cocochanel + swallow love = ❥
To make the Northern Lights shine in new splendor, we documented a small excursion into the processing with loden and, based on the 2022 door pattern, sewed a vest with cap sleeves for the Northern Lights.
NORTHERN | WEST VERSION
✁ PREPARATORY WORK ✁
Fabric choice
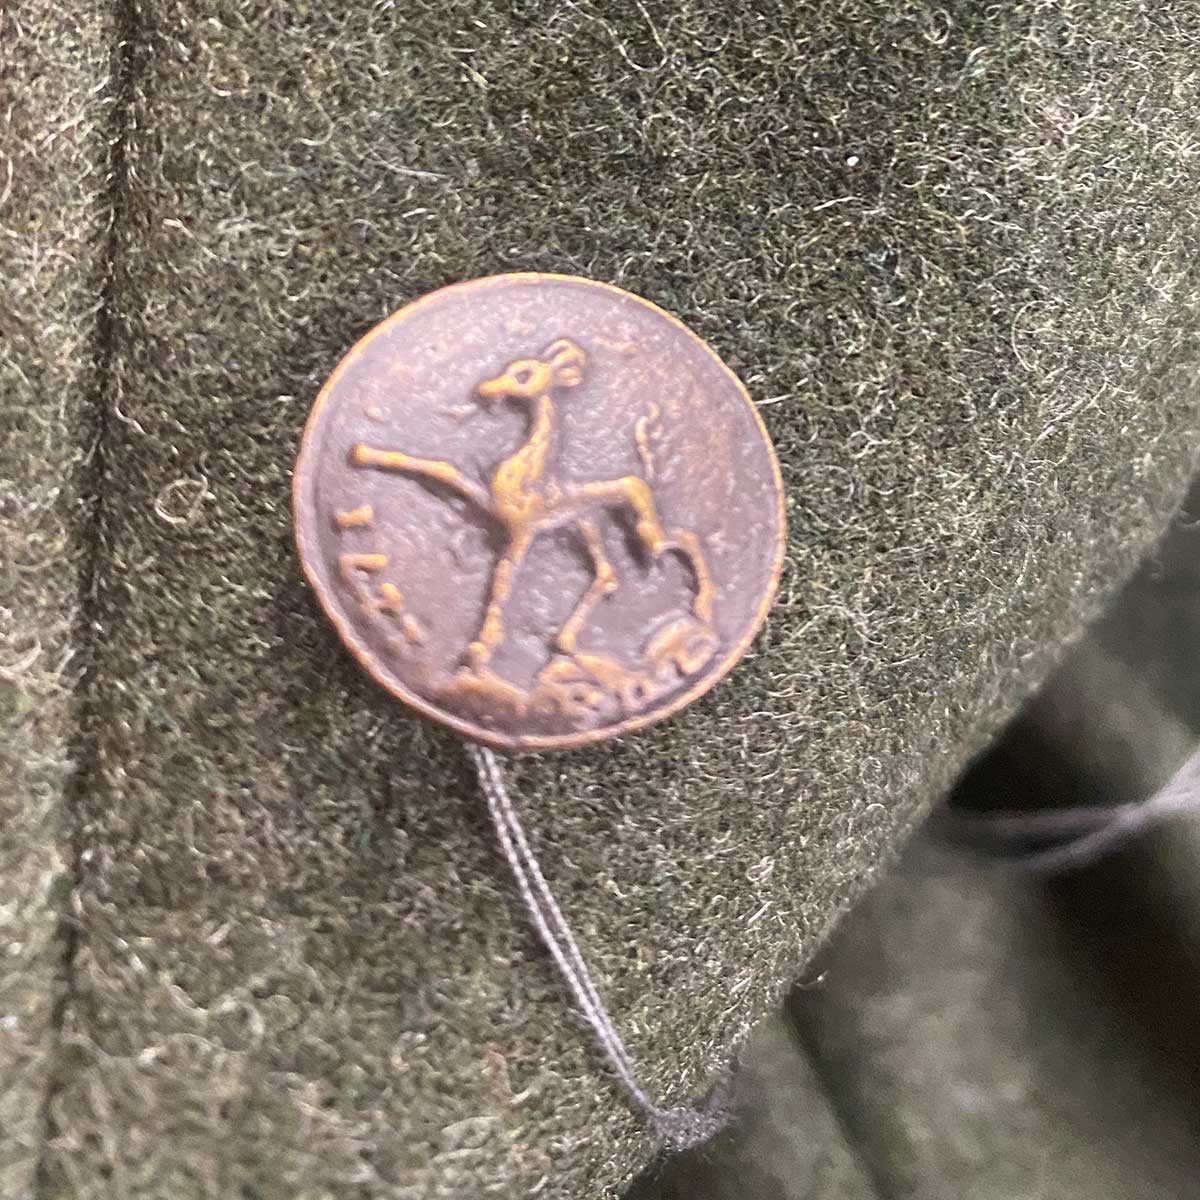
In our example, we used loden cloth with traditional buttons. Coat fabrics and blends with a firm structure are a fine option. But #likewool or wool-like fabrics are also a good choice.
Size recommendation
The Northern Lights cardigan is a fine piece with well-placed darts and designed for stretchy fabrics. In most cases, adapting patterns across different fabrics doesn't work well. However, since this is a vest with some freedom of movement in the arms, it was quite possible, and as a tip, we suggest you order one size larger and incorporate the darts after the first fitting. This means you sew the shoulders and baste the sides once to check the fit.
Print & Cut Parts
The first step is to print the Nordlicht pattern. You can omit the long sleeves and print the cap sleeves instead. These are available here as a free PDF file and can be downloaded.
Please note that there are three neckline options in the pattern, and these must match the facing. In our example, we have chosen the closed, close-fitting neckline because we will be adding a stand-up collar.
Adjustment of the cut pieces
For the vest, the front and back pieces are shortened to the waist, and the facing is widened on the inside by approximately 5 cm. An additional strip is needed for the stand-up collar and hem, but these will be precisely fitted later. The length of the fabric strip for the stand-up collar depends on the neckline, and the hem strip depends on the total length of the hem after the front and back pieces have been sewn together.
Sew the basic pattern together
The basic pattern is processed as instructed, the darts are added, and the shoulders are closed. Only now does the slightly modified approach begin.
-

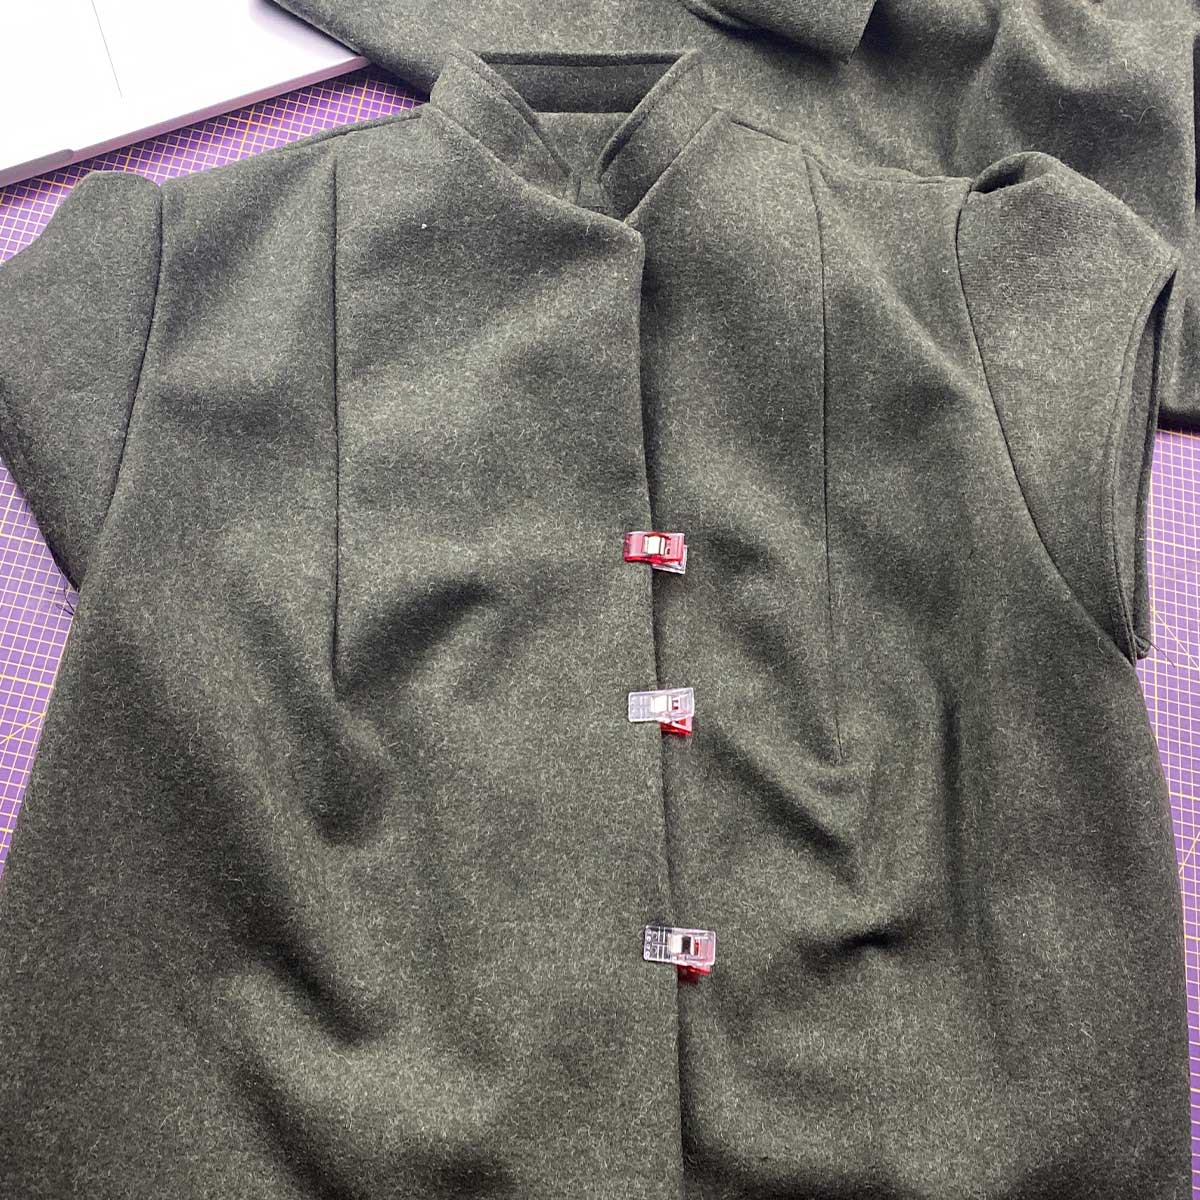
The front panel and facings should be reinforced with fusible interfacing or fusible interfacing. Since this is where the buttons will be attached, it is advisable to add reinforcement.
-
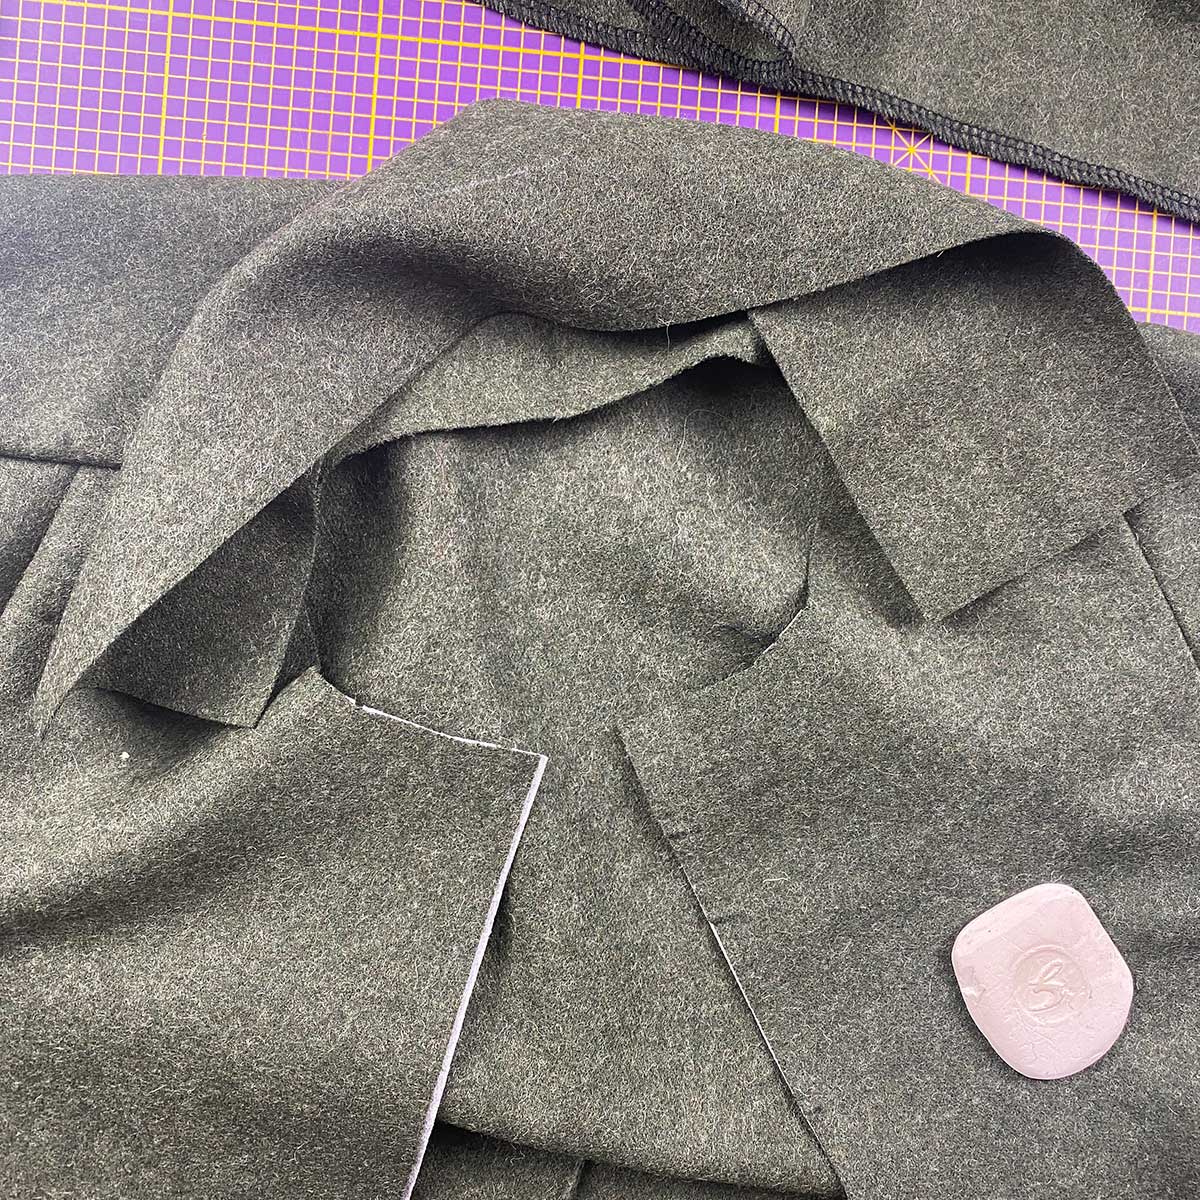
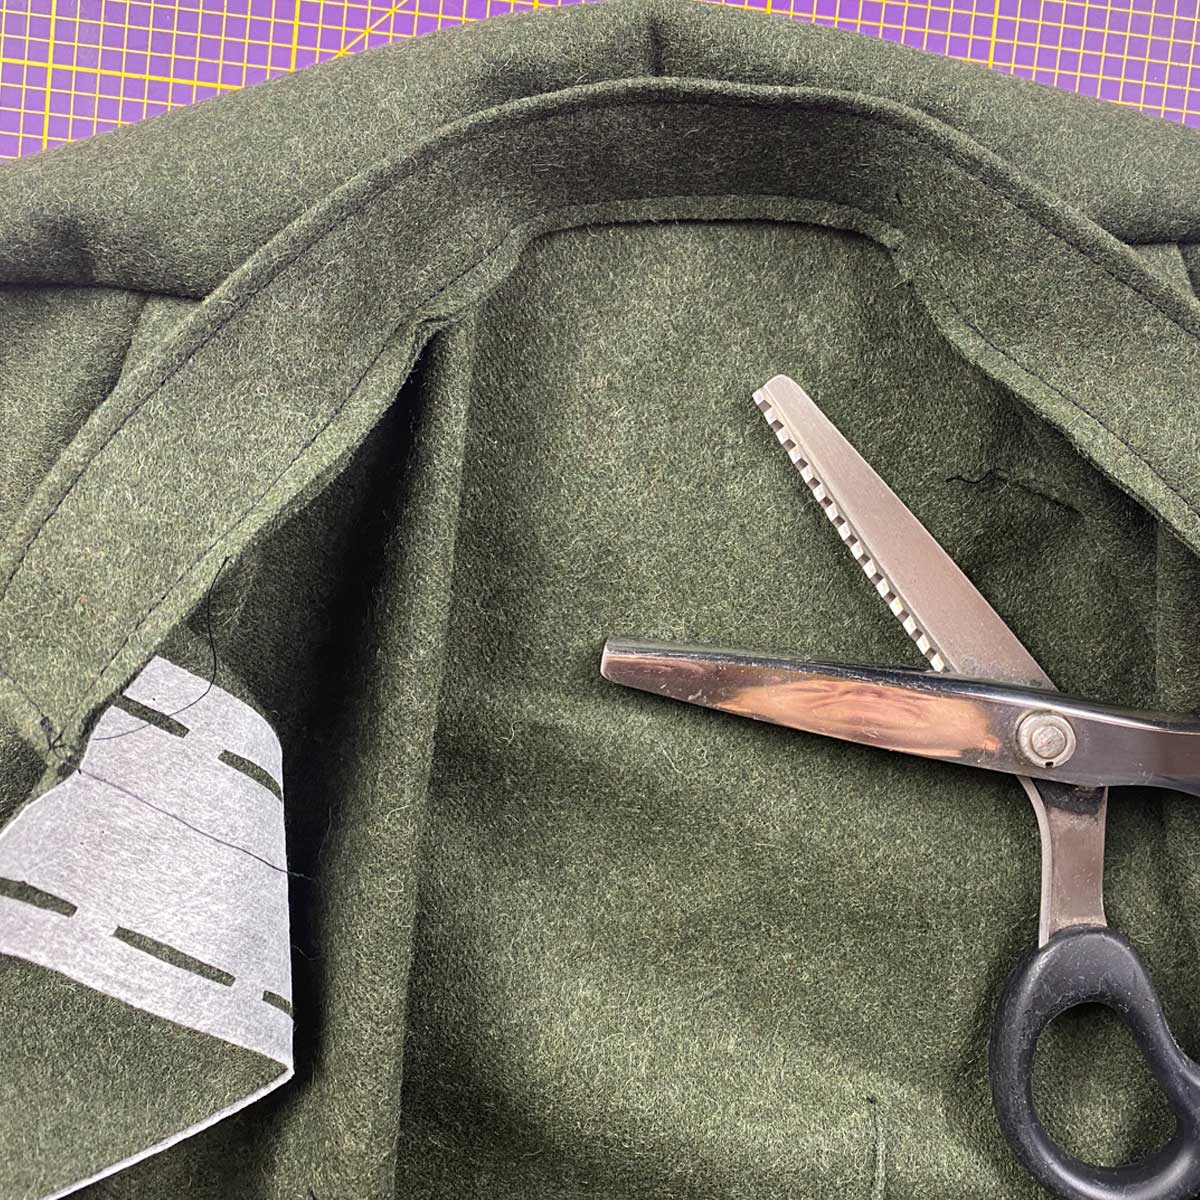
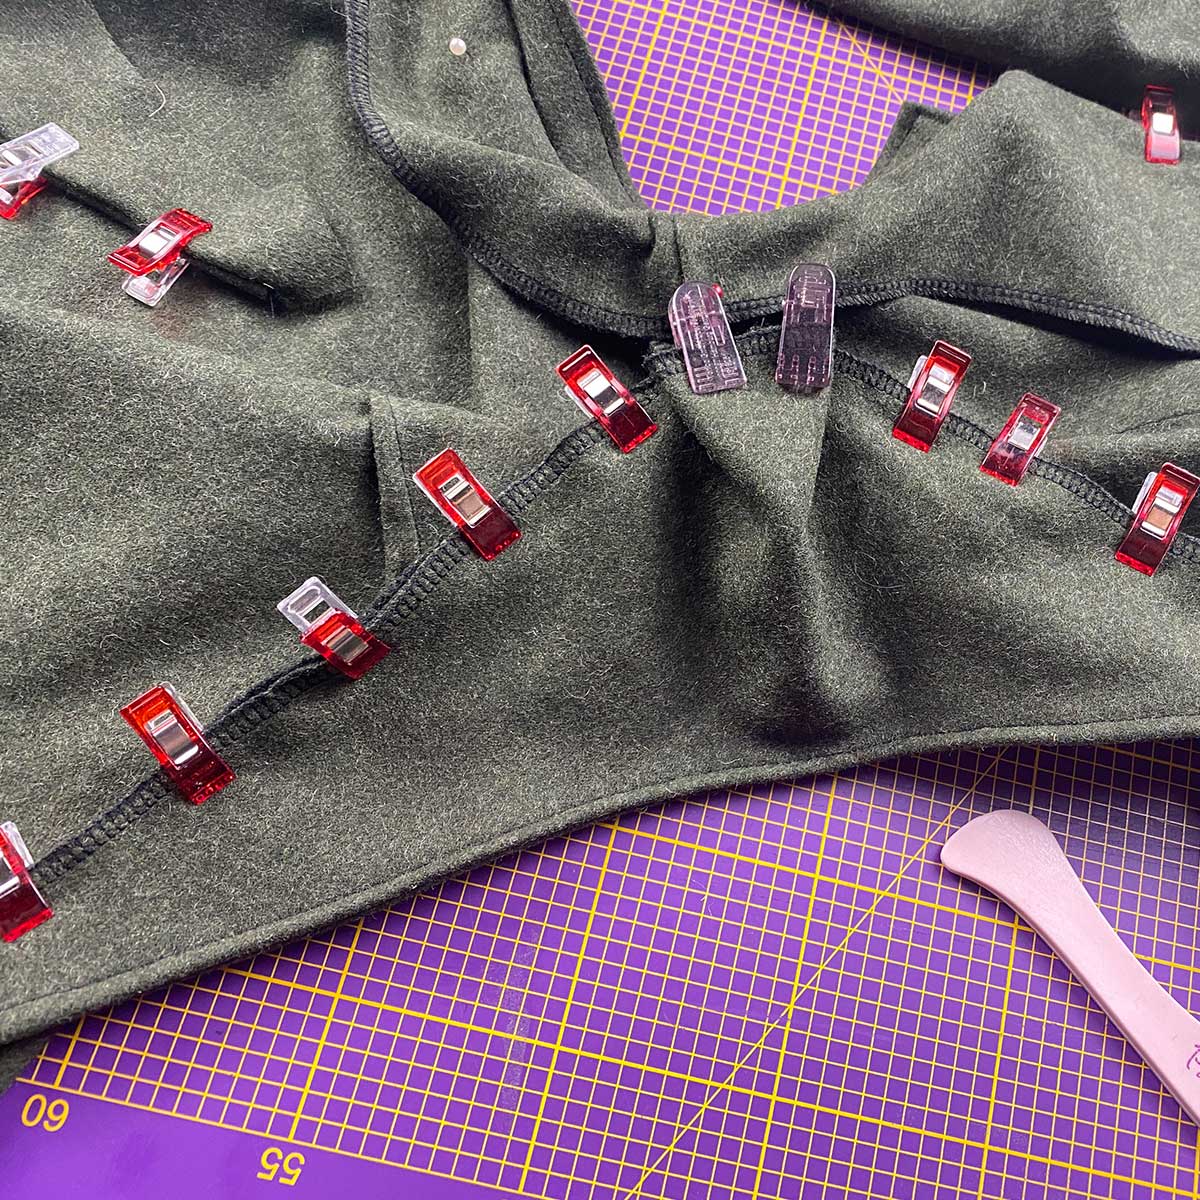
With the shoulders closed, a 7 cm high strip of fabric is placed along the neckline, and the distance is measured from the front to the other side of the neckline. It should end approximately 1 cm before the hem.
-
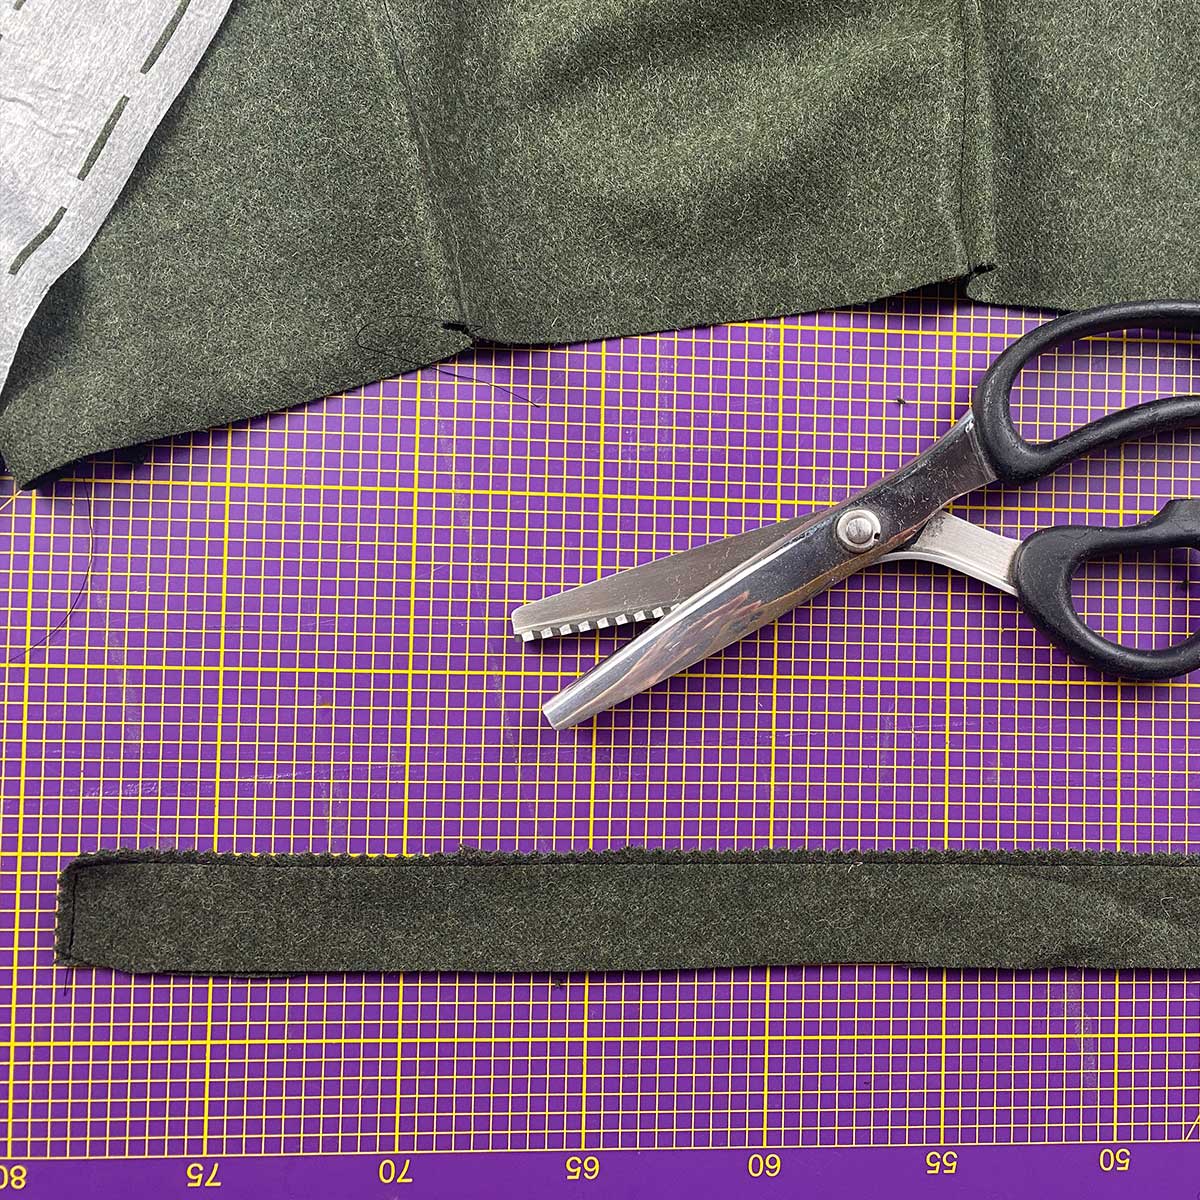
The measured distance + seam allowance is transferred to the strip, which is then reinforced on one side, folded over, stitched along the long side and edges, trimmed back, and turned right side out.
-
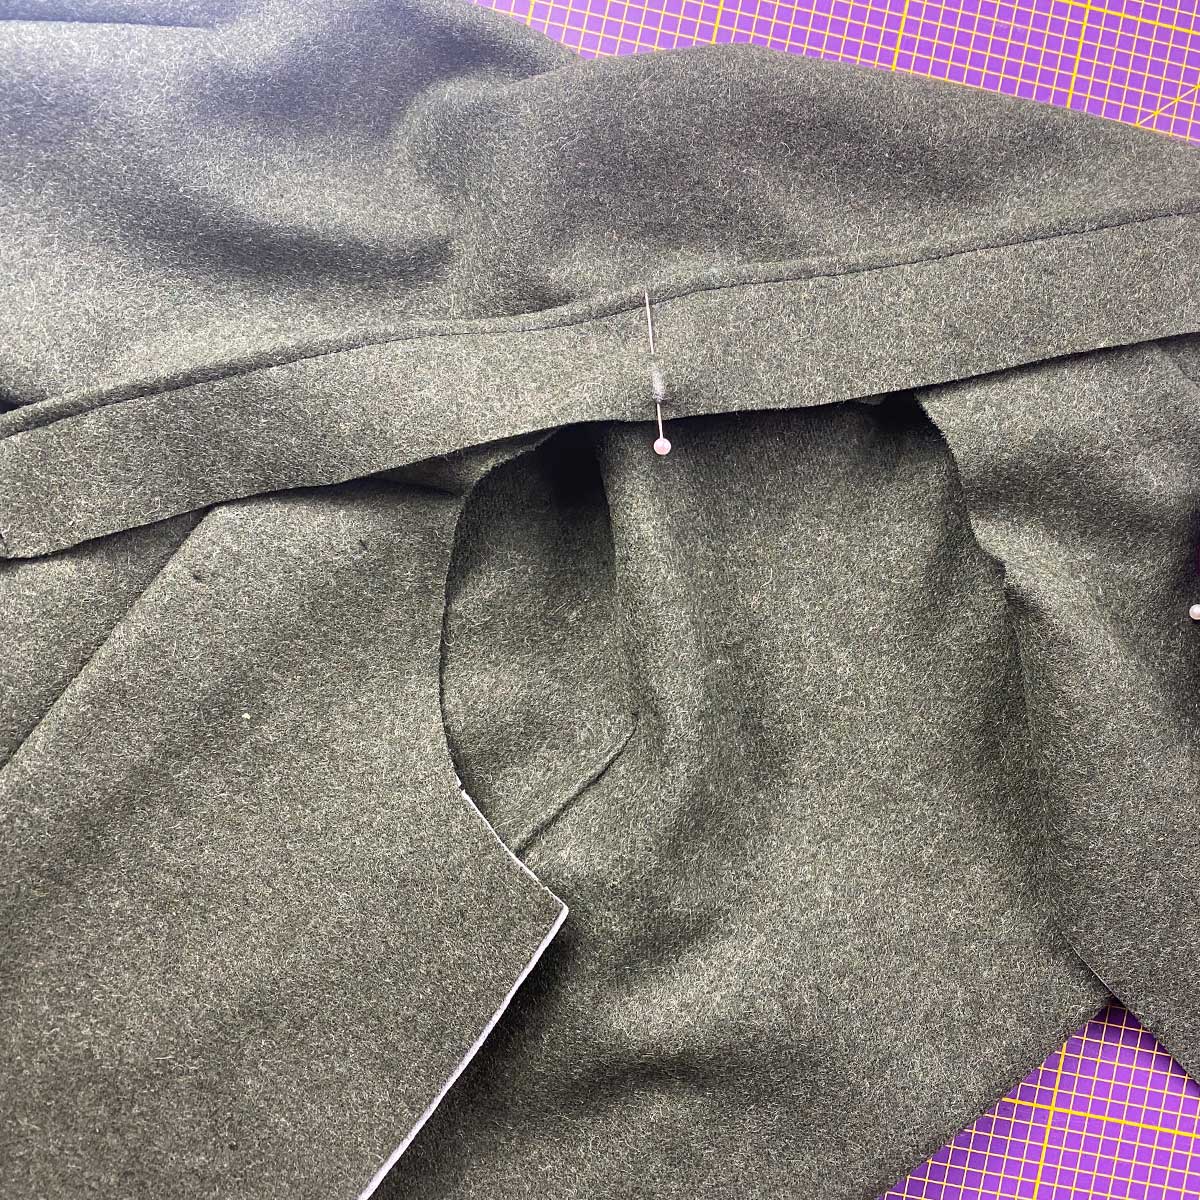
The stand-up collar is then pinned to the neckline in the center, opposite the stitches, and then attached and secured all around.
-
If you want to be on the safe side, you can topstitch the seam once or place the prepared facing directly on top and sew it in place.
-
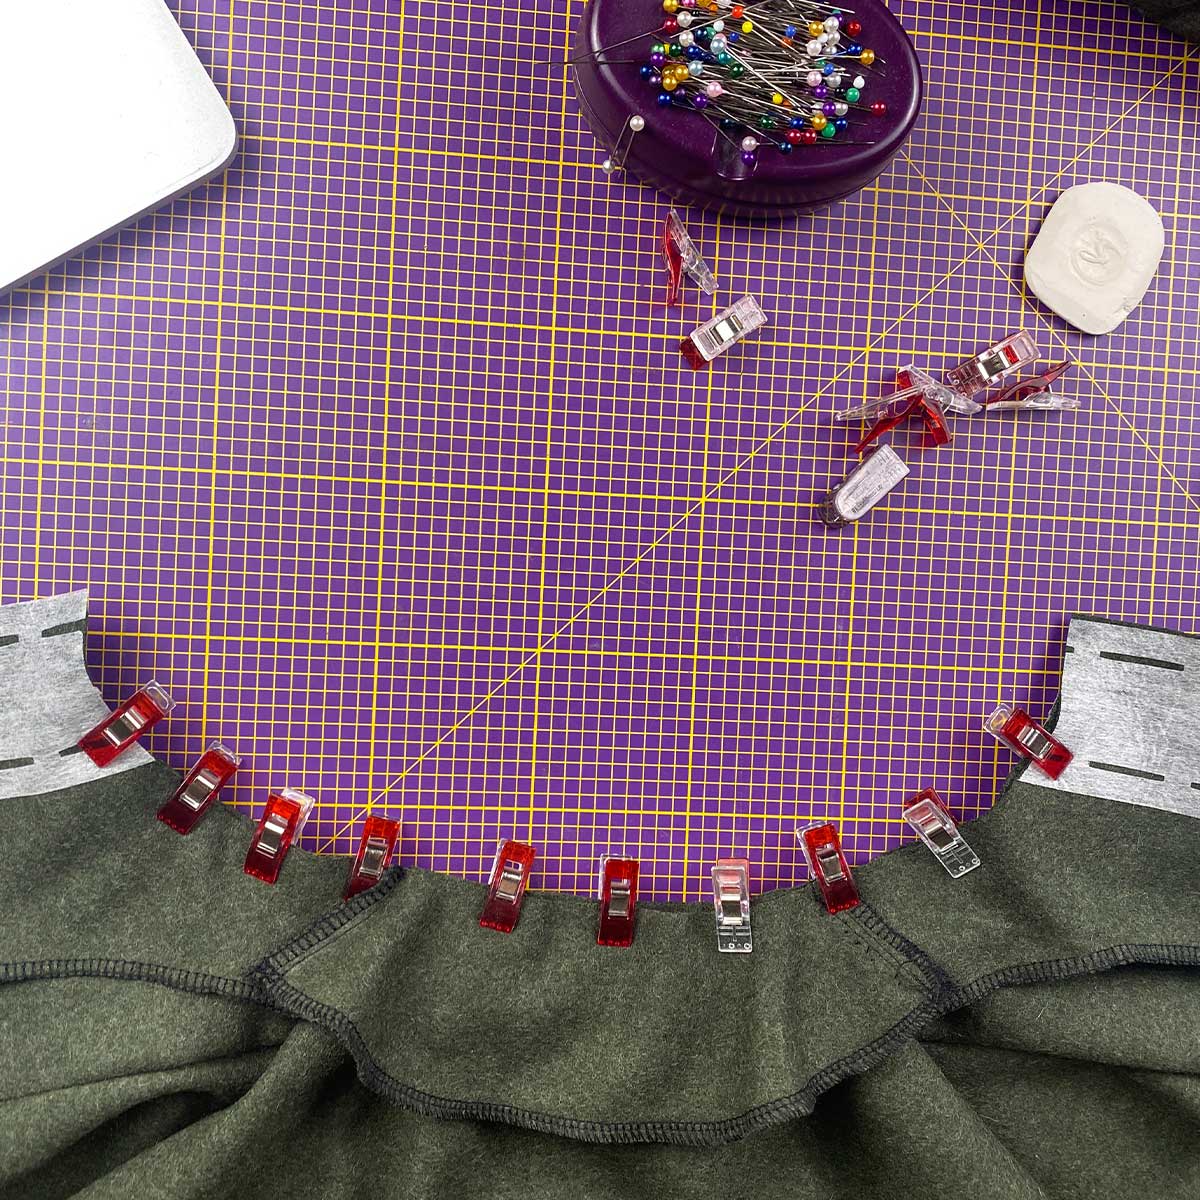
For the facing, the facing pages are joined to the back piece, and this is placed precisely on the neckline – i.e., on the stand-up collar – fixed and sewn.
-
The document is now turned over and shaped on the right side. Pins or clips help here, and everything stays in shape until the optional topstitching.
-
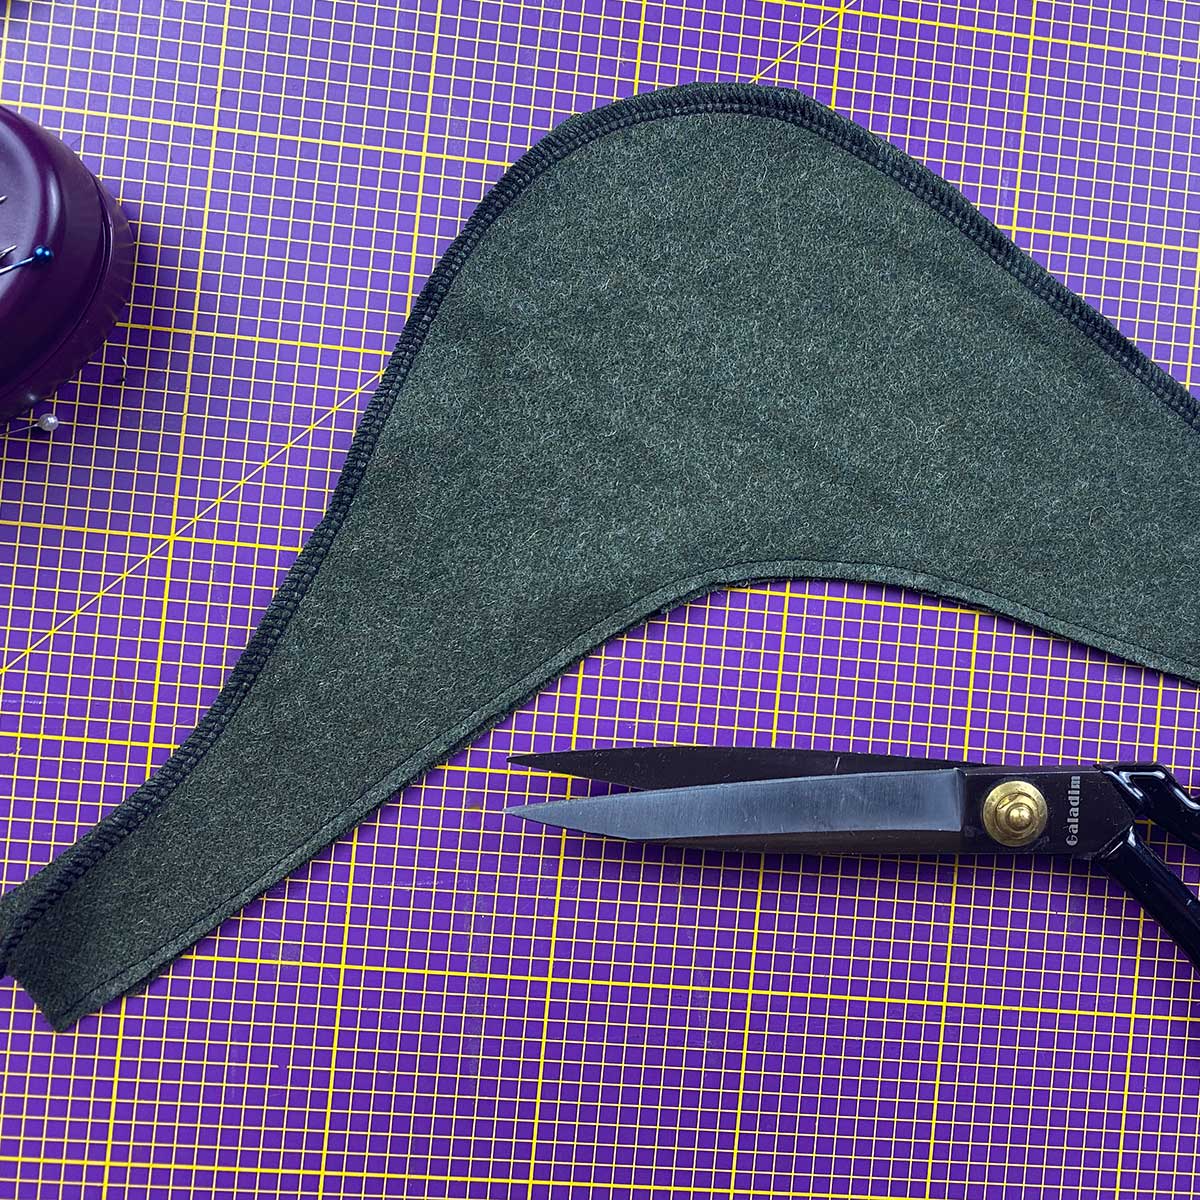
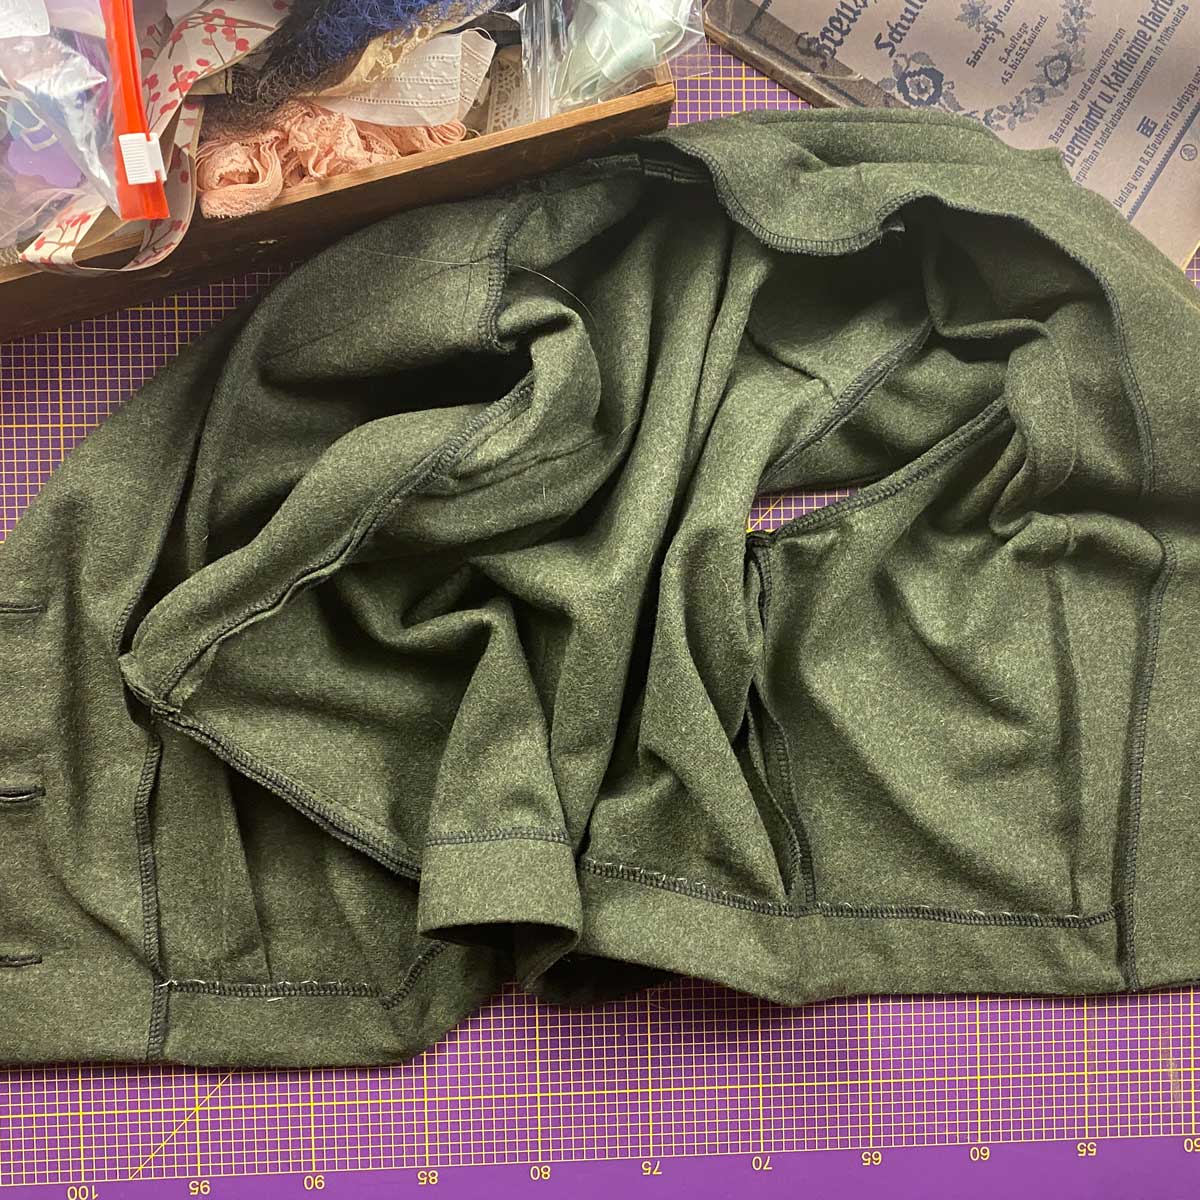
The cap sleeves are cut twice for each sleeve and sewn together at the armhole, mirroring the seams, then trimmed back. They are then turned right side out, steamed, and topstitched close to the edge.
-
Then, it is worked into the armscye and sewn like a normal sleeve. Only now are the sides of the Northern Lights closed and the piece turned right side out.
-
The workpiece now needs a hem finish, for which the total length of the hem is measured and a strip is cut as a facing, which has the necessary length and is about 4 cm wide, but without interlining.
-
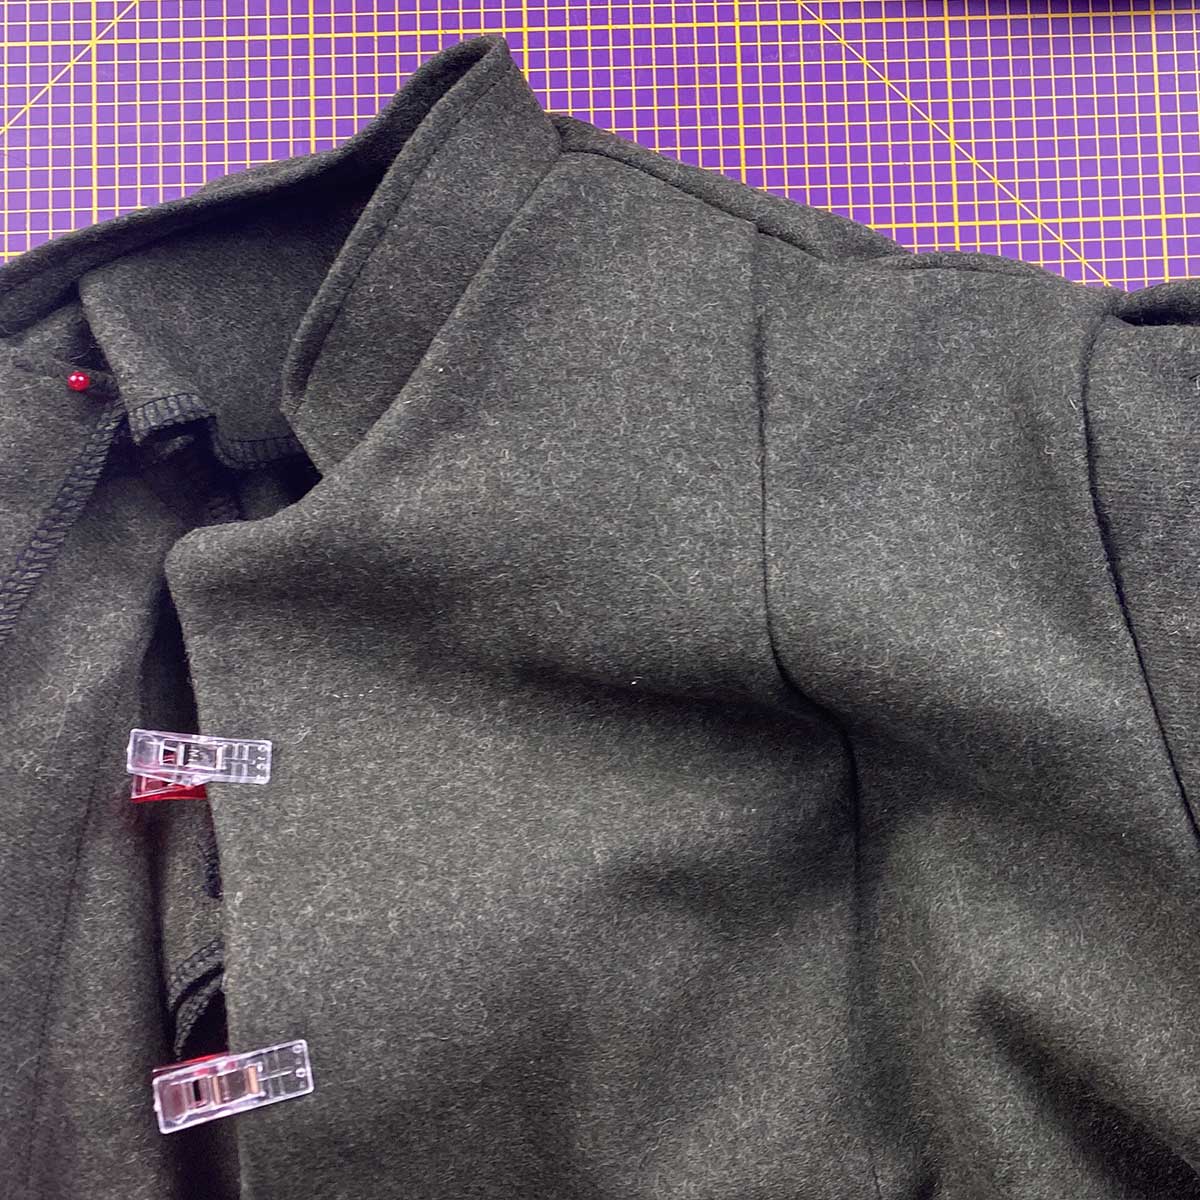
This facing is then attached to the hem in the opposite direction and folded over the folded-over facing of the front piece at the ends. The seam is then sewn and turned right side out.
-
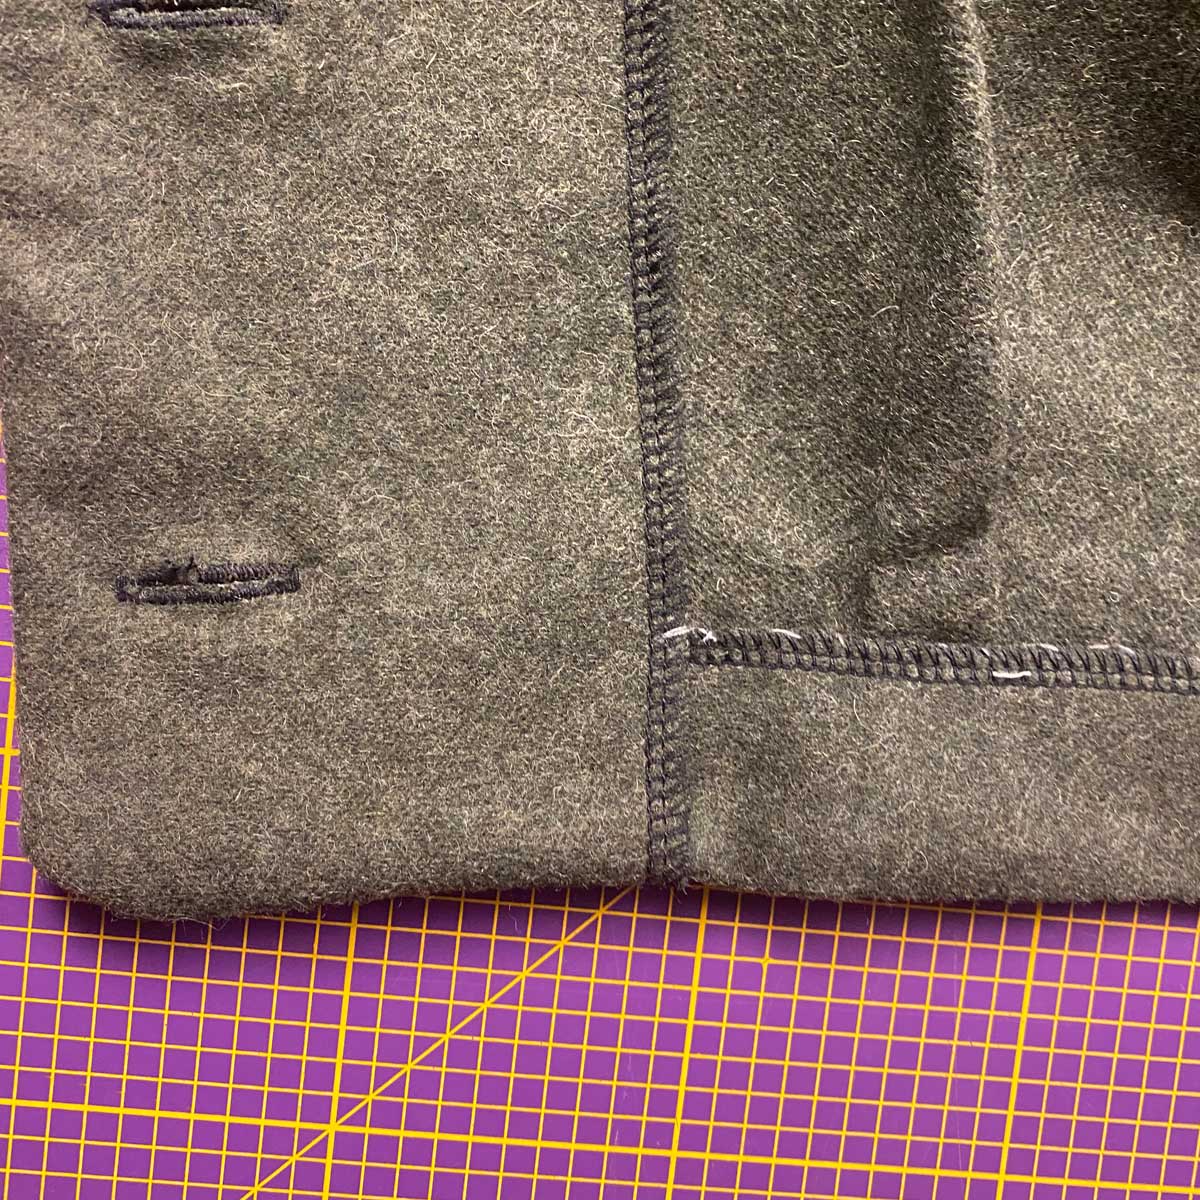
The hem facing thus disappears under the front facing. The connection between the two facings can be secured with a basting stitch, and then the hem facing can be sewn to the inside of the Northern Lights pattern using a slip stitch.
-
The vest is finished with beautiful buttons, and for a visually refined result, the facings at the neckline can be fixed in the seam allowance of the shoulders with basting stitches, or the entire neckline can be topstitched once at a distance of approximately 0.7 cm.
-

ET VOILÀ! A wonderfully fine piece of work has been created and is something to behold.
Now steam it, work in all the loose threads, and then WEAR it. With LOVE & PRIDE! -
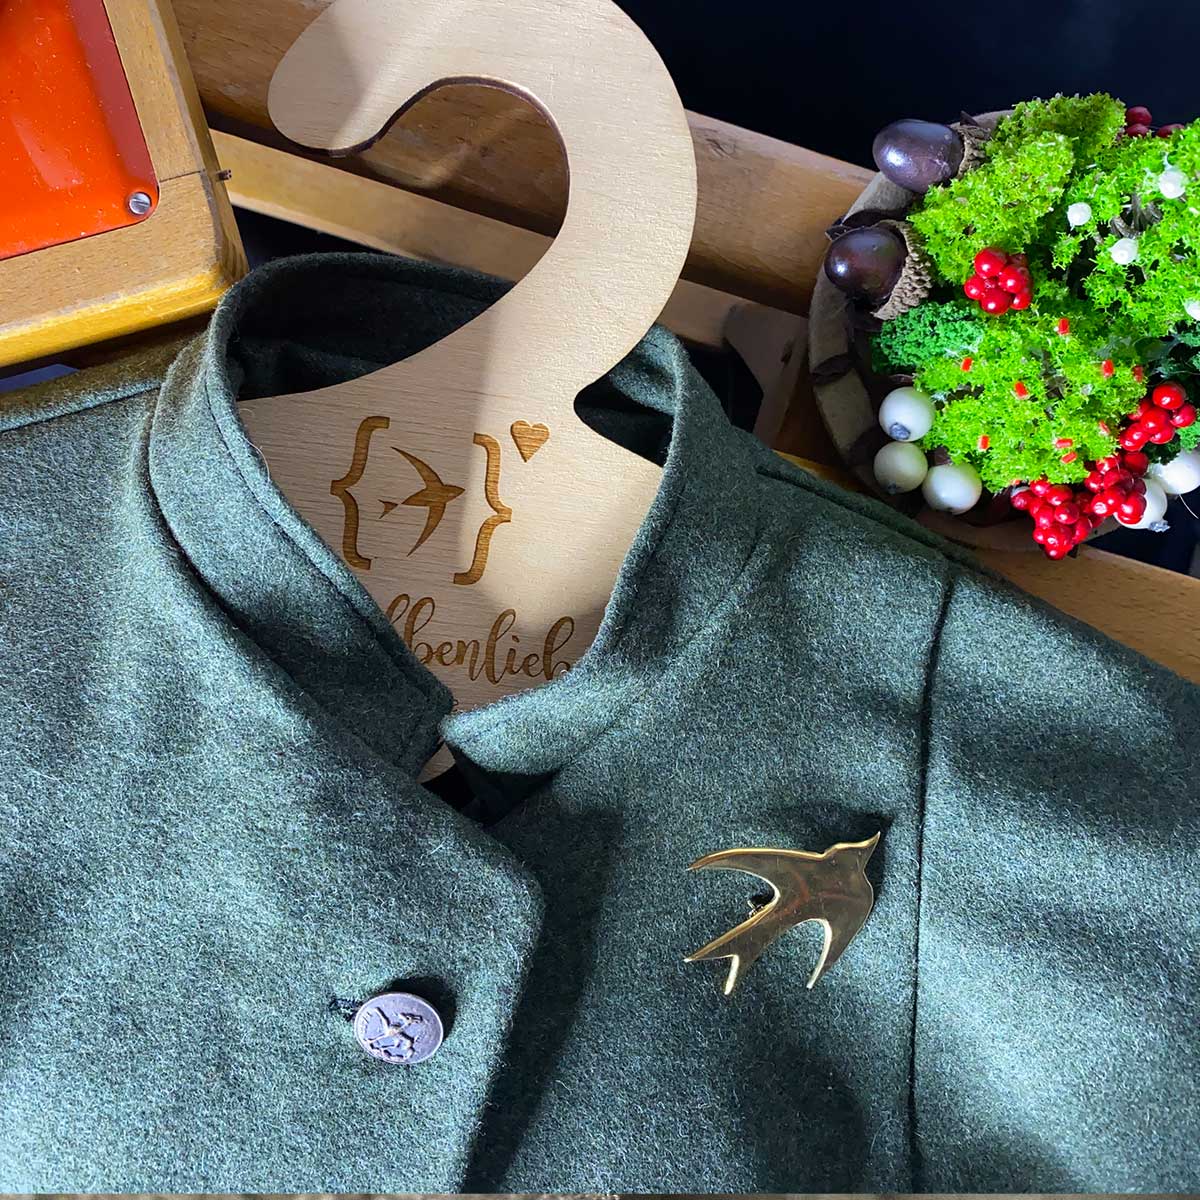
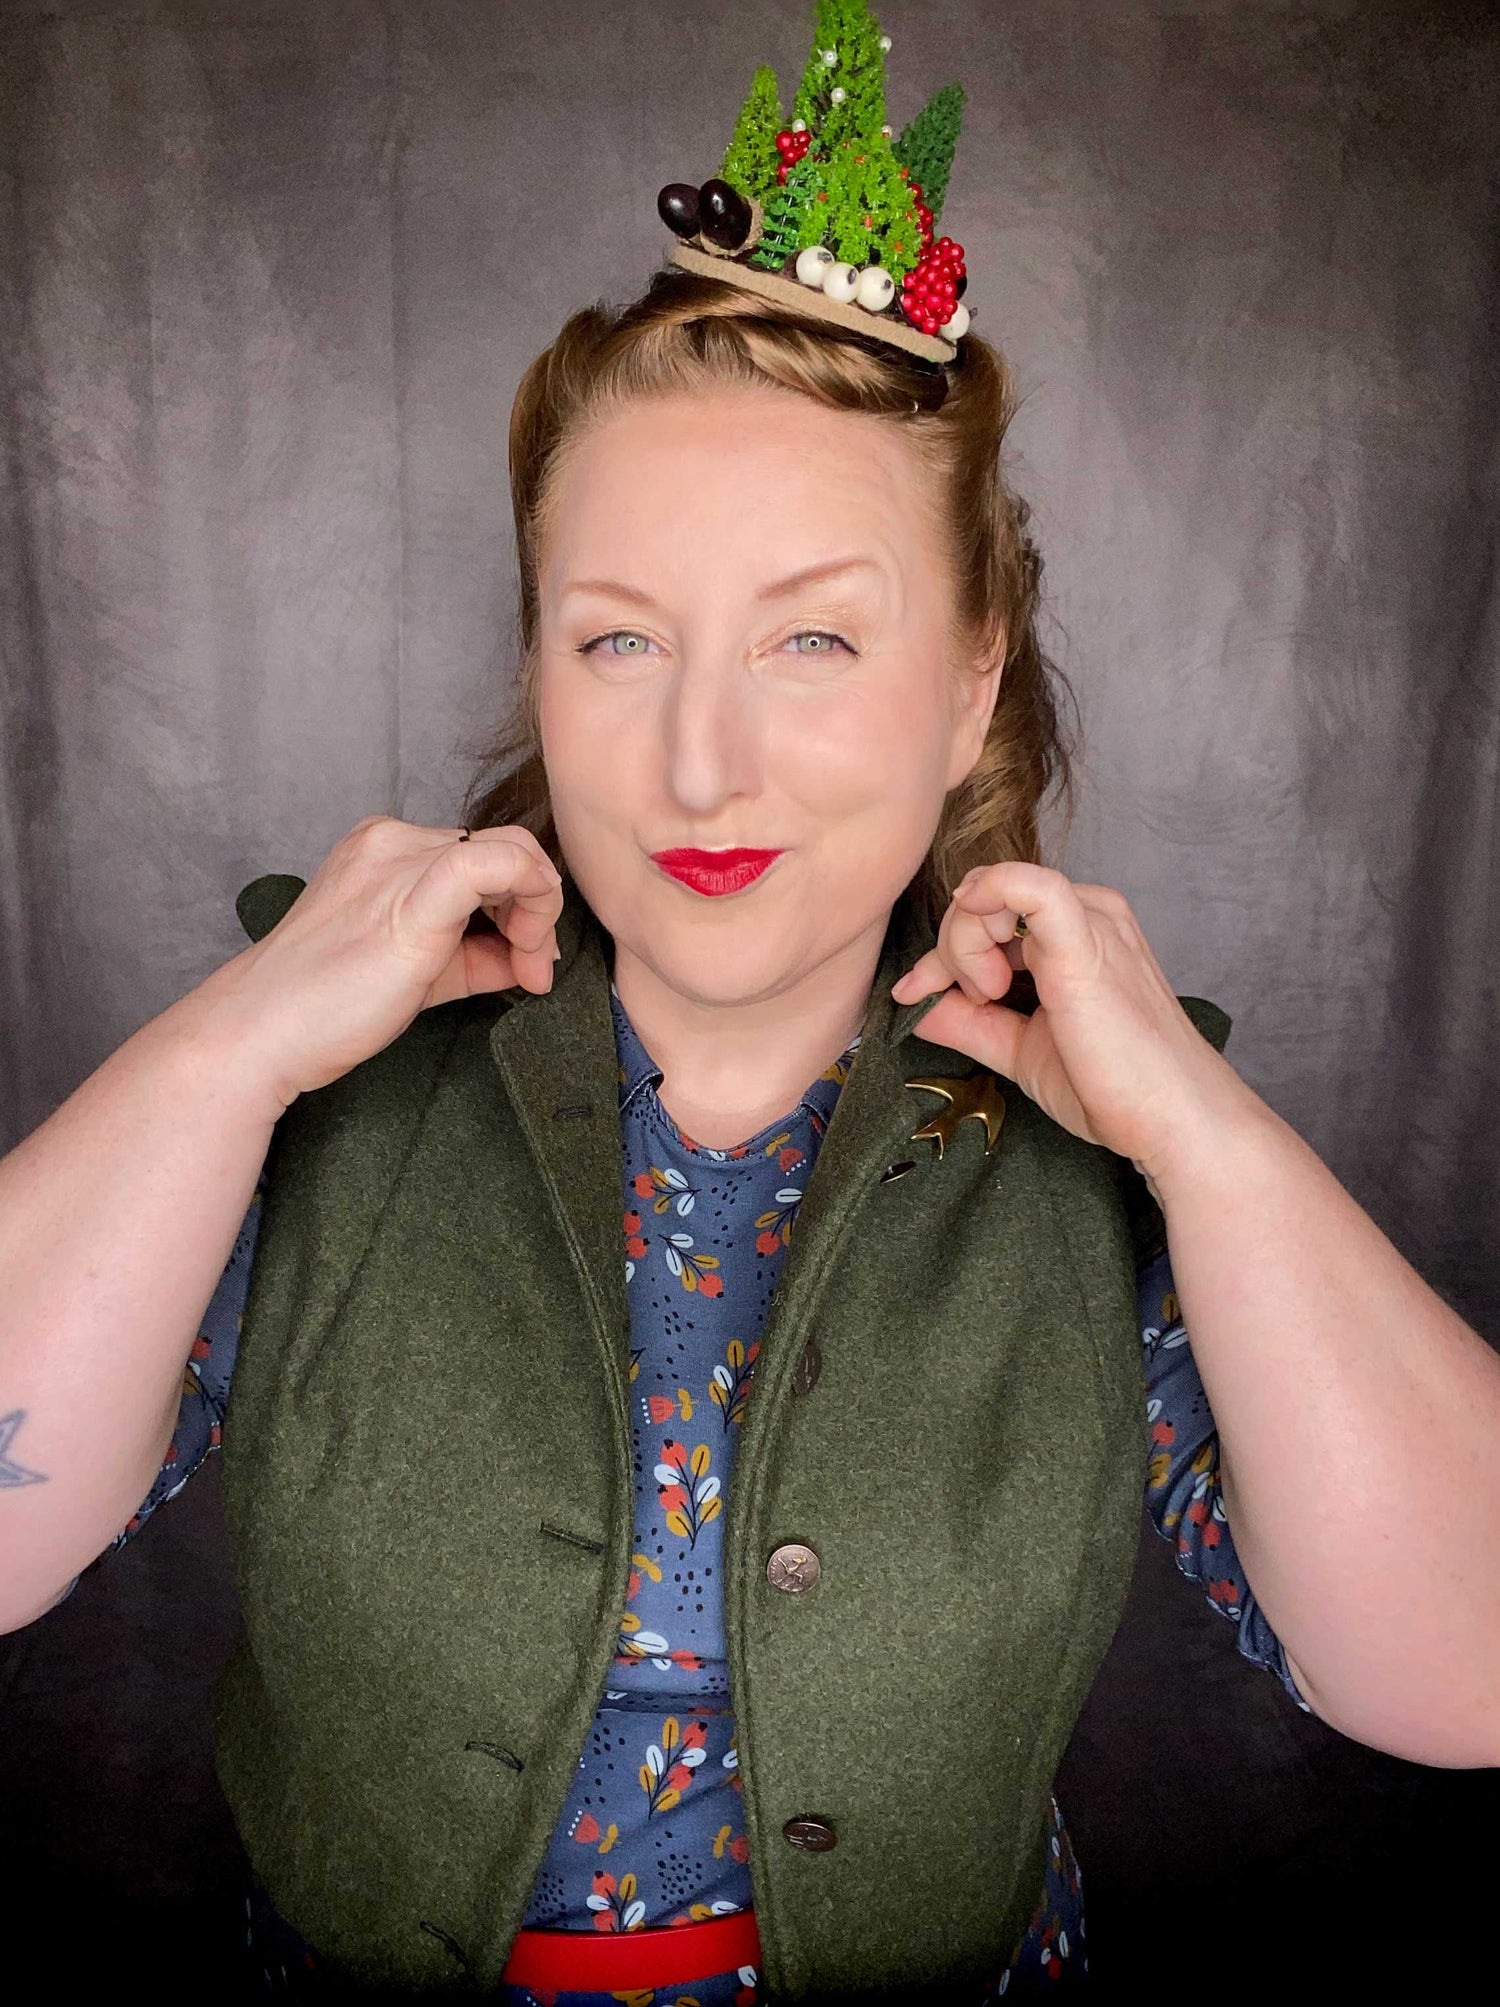
And with the favorite brooch and wonderful buttons from the last Tyrol vacation with the regular team of the Swallows, this northern light is a masterpiece and a loving embrace for every dress.


❥ A WARM APPLAUSE THE MIGHTY SWALLOWS
DIRECTLY TO THE NORTHERN LIGHTS


❥ BETTY'S TUTORIAL
A gathered hem is something special and can be achieved in just a few steps. Betty has provided a charming example with her "Northern Lights" dress, along with a tutorial. With a little creativity, you can adapt the "Northern Lights" pattern pieces to create a vest with a peplum, making it as wonderful as my dear Betty – our hygge Swallow.
-
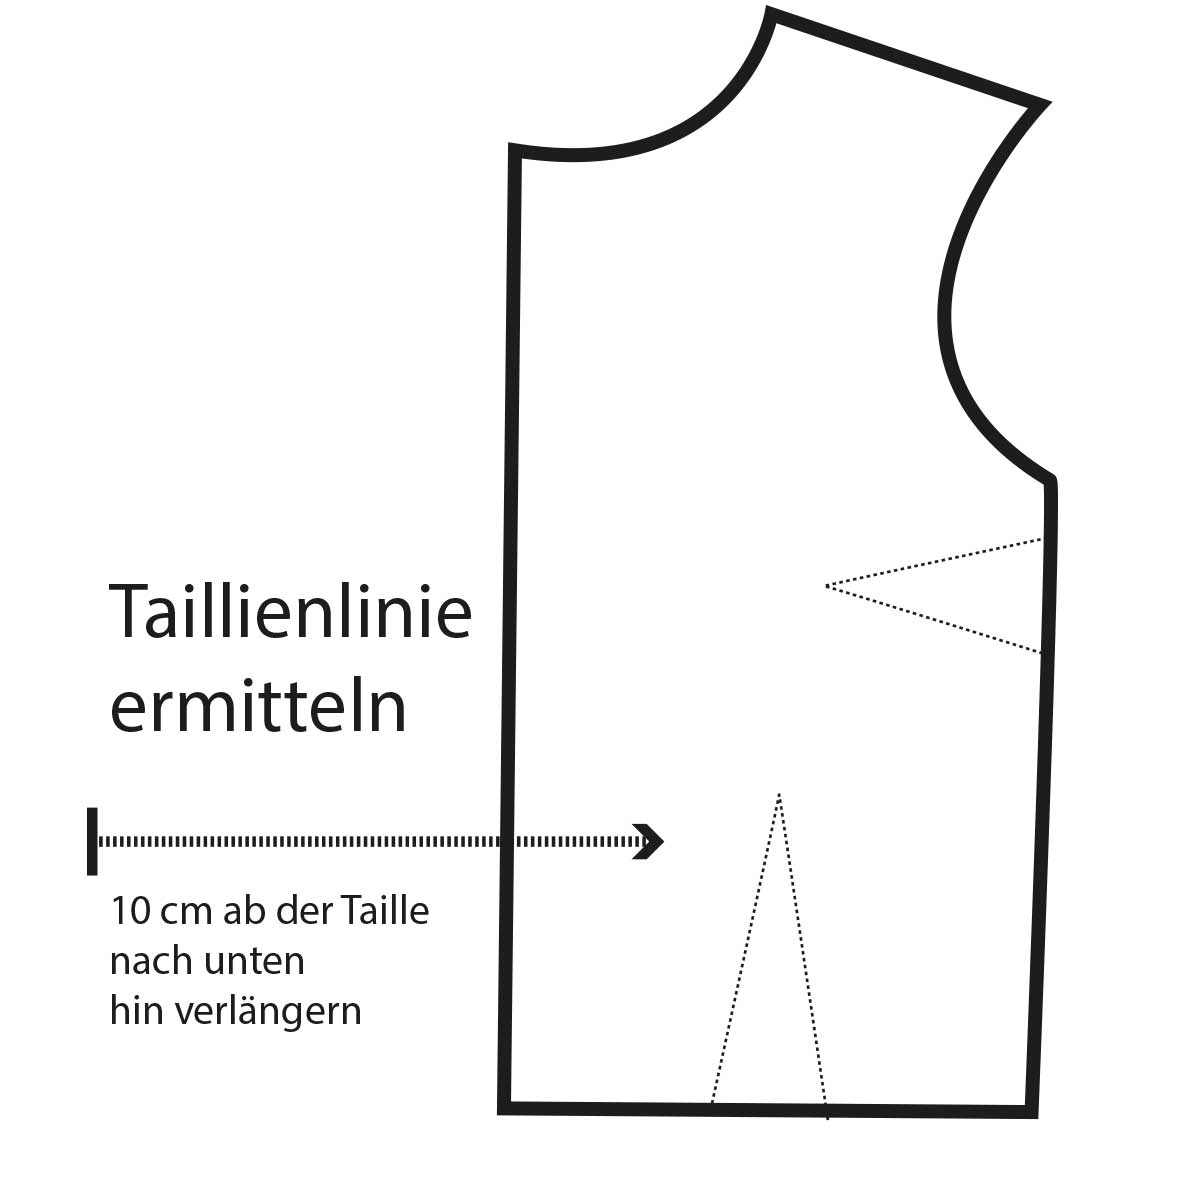
Find the waist seam and extend it downwards by approximately 10 cm.
-
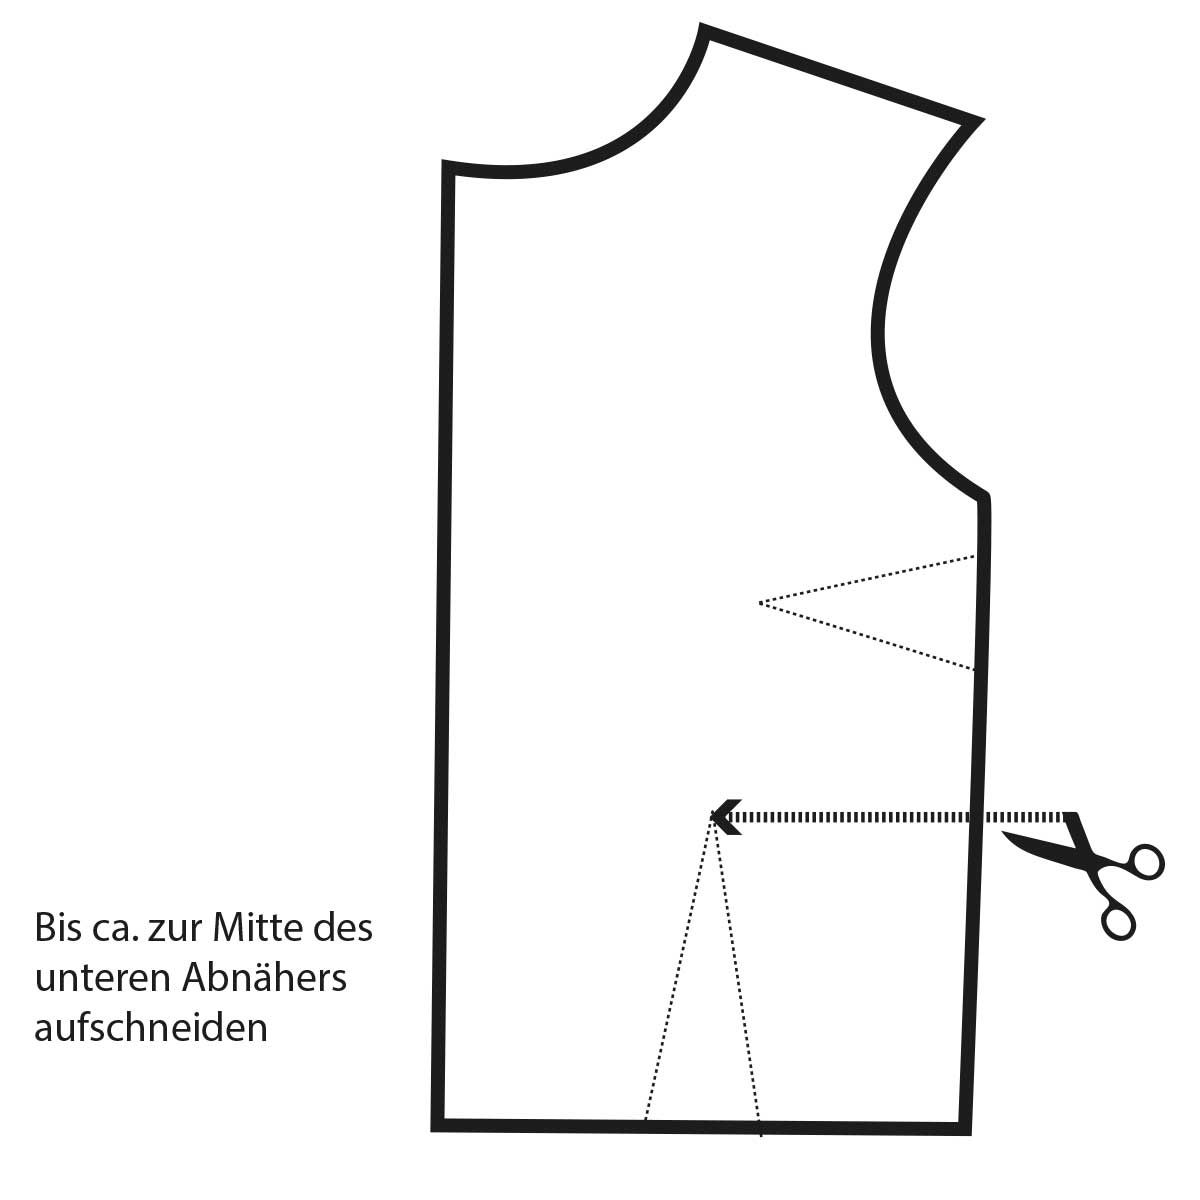
Cut into the waistline up to the middle of the dart.
-
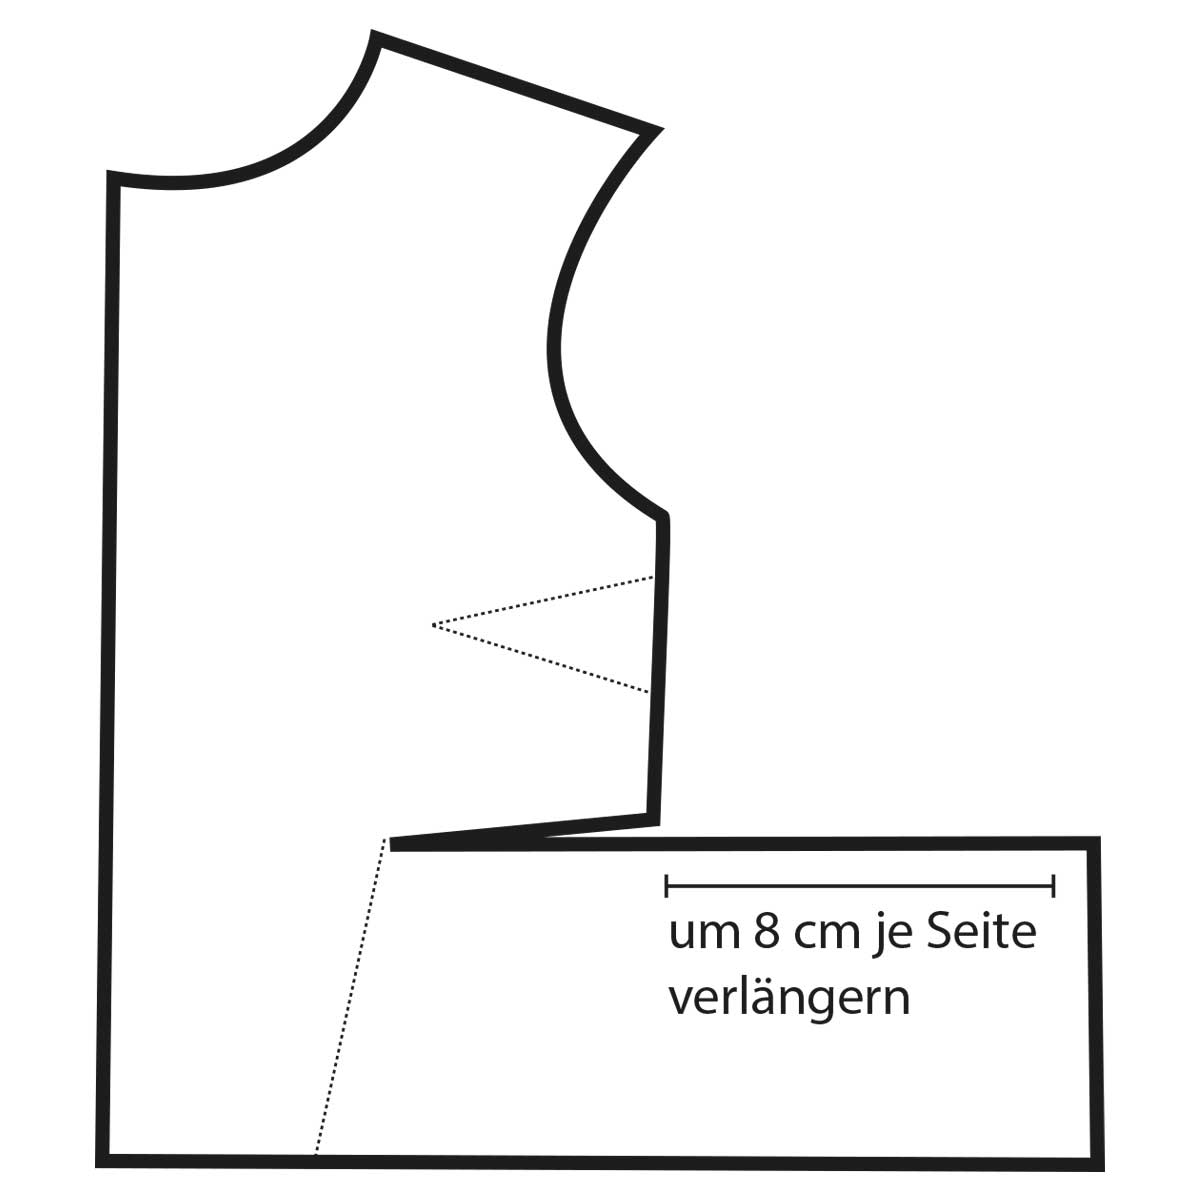
Extend the lower section by 8 cm on each side.
-
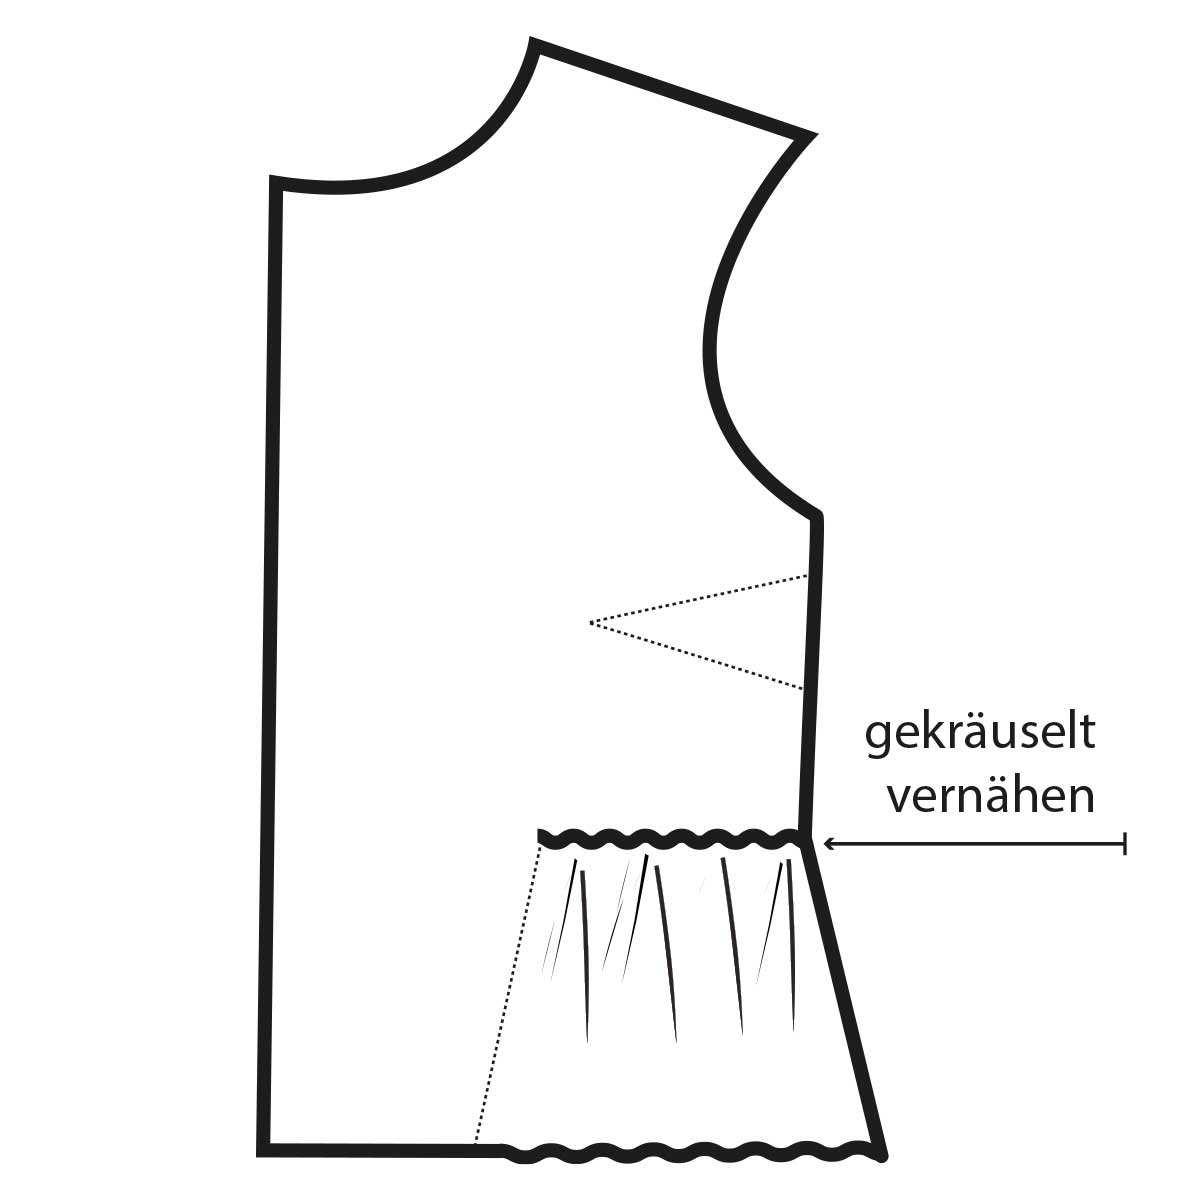
Sew the gathered section close to the edge at 0.5 cm and taper to a point, similar to a dart.
Then work out the dart normally and sew over the end of the insert. -

-

-
-


